Skip to content
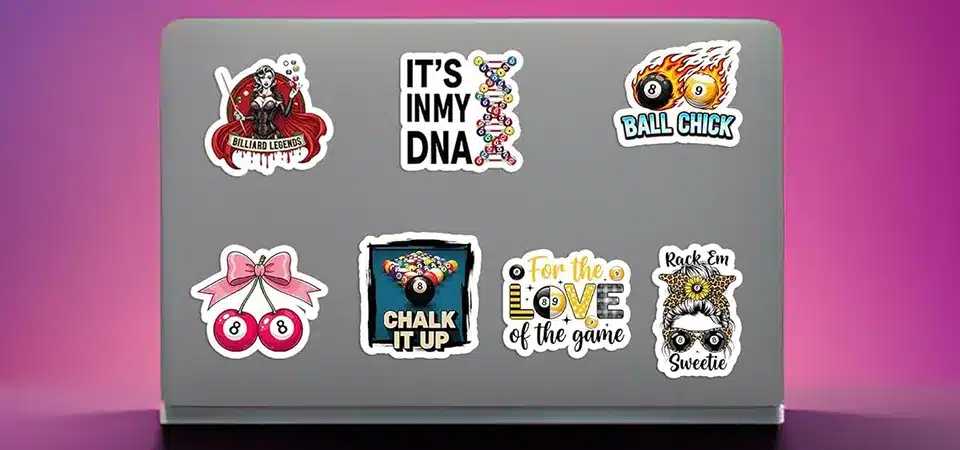
Your laptop stickers are old and peeling, or you need to sell it. But you're worried about ugly scratches and that sticky, dirt-collecting mess left behind.
The safest method is to gently warm the sticker with a hair dryer for 15–30 seconds. Lift an edge with a plastic card, peel it slowly back on itself, and use isopropyl alcohol on a microfiber cloth to wipe away any sticky residue.
As someone who runs a sticker printing business, I get this question all the time. People love personalizing their tech, but they're rightfully nervous about removal. The truth is, it’s easy if you're patient and use the right technique. Damaging your laptop is completely avoidable. Before you begin, just make sure to power down your laptop and unplug everything. Now, let’s break down the exact steps and tools so you can do this with confidence.
Should You Even Remove Stickers from Your Laptop?
You're about to peel a sticker off, but you suddenly hesitate. What if removing that company or warranty sticker will cause a problem you haven't thought of?
Before starting, consider if the sticker belongs to your company or covers a warranty seal, as removal could void agreements. For resale, a clean laptop is best. If the stickers are just old and worn, removing them will instantly update your device's look.

I always advise my clients to think for a moment before they start peeling. While most stickers are fine to remove, a few can cause issues that have nothing to do with damaging the surface.
Ownership and Agreements
Many company-issued laptops have asset tags or other identifying stickers. Removing these can violate your company's IT policy. Similarly, some laptops have "Warranty Void if Removed" stickers over screw holes or case seams. If your device is still under warranty, you should leave these alone. Once the warranty has expired, you can remove them without worry.
Resale Value
If you plan to sell your laptop, a clean, sticker-free surface will almost always get you a better price. Buyers want a device that feels new to them, not one covered in your personal collection of decals. Taking the time to properly remove all stickers and residue shows that you've cared for the device and presents it in the best possible light.
Personal Aesthetics
Sometimes, the reason is simple: the stickers are old, faded, or peeling. A worn-out sticker can make an otherwise perfect laptop look dated and messy. Removing them gives your device a fresh start. You can leave it clean for a minimalist look or apply new, high-quality stickers that better reflect your current style.
What Tools Do You Need to Remove a Sticker Safely?
You reach for a knife to scrape off a stubborn sticker. You know it's a bad idea, but you don't know what else to use to get the job done.
Gather a hair dryer, a plastic scraper (like a gift card), isopropyl alcohol (70%+), and microfiber cloths. Never use metal tools, as they will scratch your laptop. Patience is the most important tool of all.

Using the wrong tool is the number one cause of damage. In my shop, I have a dedicated "removal kit" with everything needed to do the job safely. You can easily make one yourself with things you already have around the house.
| Tool Category | Recommended Items | Why It's Needed |
|---|---|---|
| For Heating | Hair Dryer or a Heat Gun (on lowest setting) | Softens the sticker adhesive, making it pliable and easy to peel. |
| For Scraping | Plastic Scraper, Old Gift Card, Guitar Pick, Plastic Razor Blade | Lifts the sticker's edge without scratching plastic or metal surfaces. |
| For Cleaning | Isopropyl Alcohol (70-90%), Goo Gone, Mild Dish Soap | Dissolves the leftover sticky residue without damaging the finish. |
| For Wiping/Buffing | Microfiber Cloths, Cotton Swabs | Applies solvents safely and buffs the surface clean without leaving lint. |
What You Must Avoid
The most important rule is to never use metal on your laptop's case. This includes knives, box cutters, metal scrapers, and even steel wool. These will leave permanent scratches on both plastic and metal surfaces like a MacBook's aluminum shell. Also, avoid harsh chemical solvents like acetone (nail polish remover), lacquer thinner, or gasoline. These chemicals can melt plastic, discolor paint, and damage the protective anodized coating on aluminum laptops.
What Is the Best Method for Removing the Sticker?
You're ready to start, but there are so many methods. Heat? Oil? Solvents? You're afraid of choosing the wrong one and damaging your laptop's finish.
The heat method is safest and most effective. Use a hair dryer on low for 15–30 seconds to soften the adhesive, then peel the sticker off slowly with a plastic card. This method minimizes residue and the risk of damage.

I always recommend starting with heat. It's the most gentle and effective technique for almost all vinyl stickers. It works by making the adhesive soft and gummy, releasing its grip on the surface.
Method 1: The Heat Technique (My Go-To)
- Set your hair dryer to a low or medium heat setting.
- Hold it 4-6 inches away from the sticker and move it in constant circles. Don't hold it in one spot.
- Warm the sticker for about 15-30 seconds. The goal is to make it warm to the touch, not hot.
- Lift an edge with your fingernail or a plastic card. If it lifts easily, you're ready to peel. If not, apply another 15 seconds of heat.
- Peel slowly at a low, shallow angle. Pull the sticker back on itself rather than straight up. This reduces the chances of tearing the sticker or leaving residue behind. Keep applying small bursts of heat as you go to keep the adhesive soft.
What About Special Cases?
For stickers near sensitive areas like vents, speaker grilles, or the keyboard, you should avoid heat and liquids. In these cases, I've had success with a simple trick: slide a piece of dental floss or fishing line under the edge of the sticker. Then, use a gentle "sawing" motion to slice through the adhesive from underneath.
How Do You Get Rid of the Sticky Residue?
The sticker is off, but now you have an ugly, sticky square left behind. It collects dust and fingerprints, looking worse than the original sticker ever did.
Apply 70-90% isopropyl alcohol to a microfiber cloth and rub the sticky area in gentle circles. For stubborn spots, use a tiny amount of Goo Gone on the cloth (not the laptop), then wipe clean with a damp cloth.

Dealing with leftover adhesive is the final challenge, but it’s easy to win if you use the right cleaner. Never apply a liquid directly to your laptop; always apply it to your cloth first.
The Alcohol Method
Isopropyl alcohol is the best first choice. It's a solvent that is safe for most electronics and finishes. It effectively dissolves the adhesive without leaving an oily film. Just put a small amount on a clean microfiber cloth, lay the cloth on the sticky spot for about 30 seconds to let it work, and then rub in small circles. The residue should start to ball up and wipe away.
For Stubborn Gunk
If alcohol isn't cutting it, you have a few other options.
- Tape: Press a piece of masking tape or painter's tape firmly onto the residue and rip it off quickly. The adhesive on the tape will pull up the residue. You may need to repeat this a few times with fresh tape.
- Pencil Eraser: A clean white pencil eraser can also work. The friction from rubbing the eraser over the residue can cause it to ball up and lift off.
- Commercial Remover: Products like Goo Gone are very effective, but they are oil-based. Use only a tiny amount on your cloth, rub the spot, and then immediately clean the area with a fresh cloth dampened with water and a drop of dish soap. This removes the oily film that attracts dust.
Can You Save Stickers to Reuse Them?
You love your sticker, you just don't want it on this laptop anymore. Tossing it feels like a waste, but you don't know how to save it for later.
Yes, high-quality vinyl stickers can often be saved. Peel it very slowly using heat, trying not to stretch or tear it. Immediately place the sticker sticky-side down onto wax paper or the original sticker backing to preserve the adhesive.

Whether you can save a sticker depends entirely on its quality. In my business, we use premium vinyl that is designed to be removable. These are the types of stickers you can usually save.
What Stickers Are Reusable?
High-quality vinyl stickers are your best bet. They are thicker and more flexible, so they are less likely to tear or stretch during removal. Cheap paper stickers or older, sun-baked vinyl stickers will likely become brittle and tear into small pieces, making them impossible to save.
The Removal and Storage Process
To save a sticker, you must use the heat method described earlier. Go extra slow. The goal is to get the sticker and its adhesive layer to come off in one perfect piece. As you peel it off, avoid touching the sticky side with your fingers. Have a piece of wax paper or parchment paper ready. As soon as the sticker is fully removed, carefully place it sticky-side-down onto the paper. Smooth it out to remove any air bubbles. You can then store it flat until you're ready to use it again.
How to Re-Apply It
When you want to re-apply the sticker, it might not be as sticky as it was originally. If it doesn't stick well on its own, you can use a thin layer from a simple glue stick on the back to give it new life. For a more permanent solution, a light mist of a spray adhesive will also work.
Special Cases, Warnings, and Troubleshooting
Your sticker is crumbling into a million tiny pieces. You're trying to scrape it off an expensive MacBook, terrified of leaving a permanent scratch or chemical burn.
For old stickers, alternate gentle heat and light dabbing with alcohol. Always test chemicals on a hidden spot. On aluminum MacBooks or painted surfaces, avoid harsh solvents and aggressive scraping; stick to heat and plastic tools to prevent irreversible damage.

Not all sticker removals are straightforward. I've seen it all, from sun-baked decals that have basically fossilized onto the case to stickers on delicate painted finishes. The key is to know your surface and adjust your technique.
Laptop Material Warnings
The material of your laptop's case dictates what you can and cannot do. Using the wrong tool or chemical can cause permanent damage, so it is critical to be careful.
| Laptop Surface | What to Use | What to AVOID |
|---|---|---|
| MacBooks/Aluminum | Heat, Plastic Tools, Isopropyl Alcohol | Acetone, harsh abrasives, metal scrapers (can ruin anodized finish) |
| Plastic Shells | Heat, Alcohol, Tape | Petroleum-based solvents (WD-40), strong oils (can discolor/degrade) |
| Painted Surfaces | Heat, Plastic Tools ONLY | Any solvent, including alcohol (can cause bubbling or peeling) |
For old, crumbling paper stickers, patience is essential. They will tear. Alternate short bursts of heat with dabbing the edges with an alcohol-soaked cotton swab. Minimize moisture use, as you don't want liquid seeping into seams. Lift off the small pieces patiently with a plastic scraper.
Best Practices: Preventing Sticky Sticker Situations
You love personalizing your gear, but you dread the day you'll have to remove the stickers. The fear of future gunk and damage stops you from decorating.
Choose high-quality, removable vinyl stickers from the start. Apply them to a separate laptop skin instead of directly on the device. This allows for easy changes without ever touching the laptop's original surface. Also, avoid placing stickers over vents or seams.

Thinking ahead can save you from all this hassle in the future. As a sticker maker, I tell people that the best removal experience starts with the right application choices.
The Laptop Skin Trick
This is the ultimate pro tip for anyone who loves changing up their laptop's look. Buy a clear, removable laptop skin that fits your model. Apply the skin to your laptop first. Then, you can put all your stickers on the skin. When you want a new look, you just peel off the entire skin—stickers and all—with zero risk to your laptop's actual surface. It’s a clean slate every time.
Choose Quality and Placement Wisely
Not all stickers are created equal. Opt for high-quality vinyl stickers, which are designed for clean removal. They have better adhesive that doesn't leave as much residue. Cheaper paper stickers tend to tear and leave a mess. Finally, think about placement. Avoid putting stickers over any vents (which can block airflow and cause overheating), seams in the case, or ports. Sticking to the large, flat open areas is always your safest bet.
FAQs
You've read the guide, but specific questions are still bugging you. Is WD-40 okay? Will this mess up my laptop's performance? You need quick, clear answers.
You can sometimes reuse high-quality stickers if saved on wax paper. Proper removal won't affect performance. Do not use WD-40, as its oily base can damage plastics and leave a greasy film that is hard to clean.

These are the common questions I get from customers who are nervous about the process. Let's get them answered so you can proceed with confidence.
Can I put stickers back on after removing?
Sometimes, yes. As I mentioned, it depends on the sticker's quality. If you remove a premium vinyl sticker carefully with heat and save it on wax paper, it often retains enough stickiness to be reapplied. If it doesn't stick well, a quick swipe with a glue stick on the back can help.
Will removing stickers affect laptop performance?
The removal itself, no. However, the process can be risky if done carelessly. Getting excess liquid near the keyboard, trackpad, or vents can cause moisture damage. Applying too much heat for too long in one spot could potentially damage internal components, although this is rare with a hair dryer. Just be cautious and mindful of where you are working.
Is WD-40 safe to use on a laptop?
I strongly advise against it. WD-40 is a petroleum-based lubricant, not a cleaner. It can degrade and discolor plastic over time. Worse, it leaves behind a greasy, oily residue that is very difficult to clean off and will attract even more dust and dirt than the original sticker adhesive. Stick to isopropyl alcohol, which is designed for electronics and evaporates cleanly.
Conclusion
Removing stickers is easy with patience and the right tools. Gentle heat, slow peeling, and proper cleaning will give your laptop a fresh, like-new start without any damage.