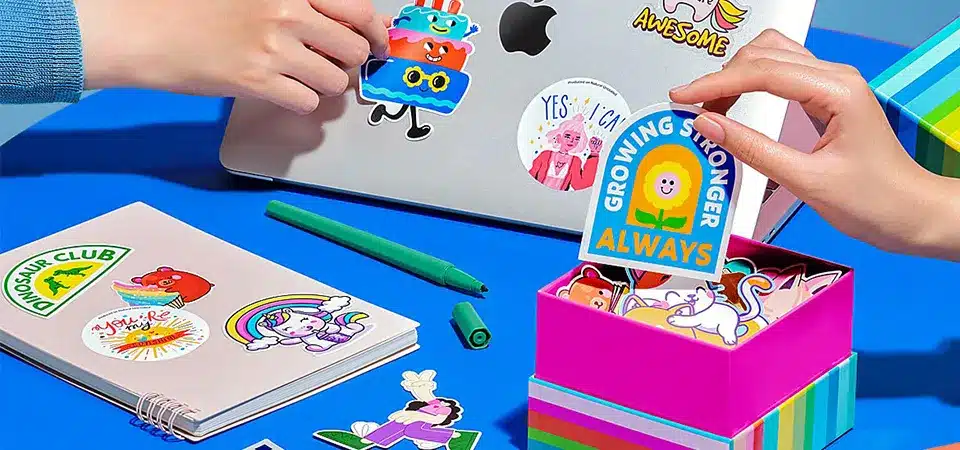
Ordering custom stickers feels complicated and risky. You worry that a single wrong choice in size, material, or design will lead to a box of useless, ugly stickers and wasted money.
To order stickers like a pro, define your sticker's purpose, choose the right material and size, prepare a high-resolution design file, select a suitable quantity, and partner with a reputable printer who offers proofs and expert guidance.
In my sticker business, I see people's hesitation every day. They have a great idea but are frozen by the number of options. My job is to make it simple. Ordering stickers shouldn't be scary. It's a creative process that should be fun. The secret is breaking it down into a few simple, logical steps. I've guided thousands of clients, from small Etsy shop owners to large event planners, through this process. Once you understand the fundamentals, you'll be able to order with confidence every single time. Let's walk through it together.
How Do You Pick the Right Sticker Size?
You take a wild guess at the size, and your stickers arrive. They're either tiny and unreadable or way too big for your product, making your brand look unprofessional and unprepared.
Pick the right sticker size by first measuring the surface where it will go. Consider the viewing distance and the amount of detail in your design. When in doubt, print your design on paper and cut it out to test it visually.

Context is everything when it comes to size. The perfect sticker for a phone case would be invisible on a car bumper. The first thing I always ask a client is, "Where will this sticker live?" You must measure that space. Don't guess. From there, think about how people will see it. A small 2x2 inch sticker is great for product packaging that people hold in their hands. A 3x3 inch sticker is a popular, versatile size for laptops and water bottles. For something that needs to be seen from a distance, like on a storefront window, you need to go much larger. A simple trick I tell all my clients is to create a paper prototype. Just print your design on a regular piece of paper, cut it out, and place it on your product. It’s a five-minute test that can save you from a huge headache. I once had a client who skipped this step and ordered 1,000 stickers that were half an inch too wide for her candle jars. We had to reorder the entire batch.
| Common Size | Typical Use | Why It Works |
|---|---|---|
| 1.5 x 1.5 inches | Small Product Seals, Envelope Stickers | Small, subtle, perfect for branding touches. |
| 2 x 2 inches | Jar Labels, Product Packaging | Good balance of size and information for handheld items. |
| 3 x 3 inches | Laptops, Water Bottles, Giveaways | The "standard" sticker size. Big enough to be noticed. |
| 4 x 6 inches | Bumper Stickers, Shipping Box Branding | Large format for making a bold statement from a distance. |
How Do You Choose the Right Sticker Material?
You pick the cheapest material to save money, but it starts peeling and fading after a week. Now your brand looks low-quality, and you have to replace the stickers anyway.
Choose your material based on the sticker's primary use. Select durable, waterproof vinyl for outdoor applications or products like water bottles. Use paper for affordable, indoor, short-term needs like packaging seals. Consider special finishes for a specific look.

The material you choose is the foundation of your sticker. It determines its look, feel, and lifespan. Choosing the right one is about matching the material to the job it needs to do. In my shop, we primarily work with two main categories: vinyl and paper, plus some exciting specialty options.
Vinyl
This is the industry standard for a reason. Vinyl is a type of plastic, which means it’s inherently waterproof and incredibly durable. It can stand up to sunlight, scratches, and rain. It's the right choice for almost any application where longevity matters: water bottles, cars, laptops, and product labels for things that might get wet, like shampoo bottles. We offer it with a glossy finish for vibrant colors or a matte finish for a modern, elegant look.
Paper
Paper stickers are a more cost-effective option, but they come with a trade-off. They are not waterproof or very durable. They are best for indoor, dry, and short-term uses. Think of them for sealing tissue paper in a box, labeling file folders, or for a one-time event. They look great but are not meant to last forever.
Specialty Materials
This is where things get really fun. Clear stickers are great for putting a logo on a glass jar without hiding the product inside. Holographic stickers create a futuristic, shifting rainbow effect that is impossible to ignore. Glitter stickers add a fun, sparkly texture that makes people smile. These materials cost more, but they create a premium experience that can set your brand apart.
How Should You Set Up Your File Like a Pro?
You find a small logo on your website and upload it. When the stickers arrive, your beautiful design is a blurry, pixelated mess, and you've just wasted your entire budget.
Set up your file by using a high-resolution image, ideally a vector file like an AI, EPS, or SVG. If using a raster image (PNG, JPG), ensure it is at least 300 DPI at the final print size and includes a bleed.

This is the most technical step, but it's also the most critical for ensuring quality. A great printer can't fix a bad file. I always explain it with a simple rule: your print file must be much higher quality than what you see on a screen.
The best possible file type is a vector. Vector files are made of mathematical lines and curves, not pixels. This means I can scale your logo from the size of a postage stamp to the size of a billboard, and it will remain perfectly sharp. Common vector formats are .ai, .eps, and .svg.
If you don't have a vector file, you can use a raster file, like a .png or .jpg. These are made of pixels. For printing, this file must be high-resolution. The standard for print is 300 DPI (dots per inch). A 72 DPI image that looks sharp on your website will look terrible when printed.
Finally, you need a bleed. This is a small area of your background design that extends beyond the final cut line. Printers are very accurate, but there can be a microscopic shift during cutting. The bleed ensures that if this happens, you see your background color instead of a tiny, ugly white edge. It's like coloring outside the lines on purpose, just to be safe.
How Do You Choose the Right Quantity?
You either order way too many stickers that end up in a closet for years, or you order too few and run out right in the middle of a big sales rush.
Choose your quantity by balancing your immediate needs against the price per sticker. The more you order, the lower the cost per unit. Start with a smaller order to test a new design, then place a larger bulk order once you're confident.

Understanding the economics of sticker printing can save you a lot of money. The most expensive part of any print job is the setup. This includes a technician reviewing your file, preparing it for the machine, and loading the material. That cost is the same whether we print 50 stickers or 5,000. This is why the price per sticker drops dramatically as your quantity increases. A single sticker might cost you $2 in a small batch, but that same sticker could cost as little as 20 cents in a large batch.
So, how do you choose? I advise my clients to be strategic. If you are testing a brand new design or need stickers for a one-time event, start small. Order 50 or 100. Yes, the price per piece is higher, but the total risk is low. You can test your design in the real world without a huge financial commitment.
However, if the sticker is a core part of your business—like the label on your coffee bags that you use every single day—ordering in bulk is much smarter. A client of mine used to order 500 labels every month. I showed her that if she ordered 2,000 labels just once per quarter, she would save nearly 40% over the year. Planning ahead saved her hundreds of dollars.
What Are Your Stickers Really For?
You ordered some cool stickers, but you don't have a plan. They just sit in a box on your desk, a wasted opportunity to connect with your customers and build your brand.
Know that stickers are for creating brand ambassadors. They are not just labels; they are mini-billboards, valuable gifts, and tokens of community. Use them to make your customers feel special and encourage them to share your brand with the world.

This is the final, most important step: understanding the true power of a sticker. A sticker is not just a piece of sticky paper. It's a marketing tool with a very unique job. Unlike a flyer that gets thrown away, a sticker is a badge of honor. People only put stickers on the things they care about most: their laptop, their water bottle, their car. When a customer puts your sticker on their property, they are no longer just a customer. They have become a voluntary brand ambassador. They are telling the world, "I like this brand. I am part of this tribe."
The most successful brands I work with understand this. They don't just sell a product; they build a community. The stickers are a key part of that. Including a "free" sticker in every order isn't a cost; it's an investment in delighting your customer. It’s a small gift that makes them feel valued and creates a memorable unboxing experience. It encourages them to share your brand, not because you asked them to, but because they want to. Before you order, don't just think about the design. Think about the feeling you want to create and the army of fans you want to build.
Ready to Stick the Landing?
Ordering custom stickers like a pro is about planning. By thinking through your sticker's size, material, file, and purpose, you can turn a simple idea into a powerful branding tool.
FAQs
Q: What is the minimum order quantity for custom stickers?
A: It varies by printer, but with digital printing, we can offer low minimums, often starting at just 50 stickers. This is perfect for testing new designs.
Q: How long does it take to get custom stickers?
A: Turnaround time is usually 7 business days for production, plus shipping time. We always provide an estimated delivery date with every order.
Q: Can you help me with my design?
A: Yes, most professional printers offer design services or can help you fix your file to ensure it's print-ready. We can help you add a cutline or ensure your resolution is correct.


