Skip to content
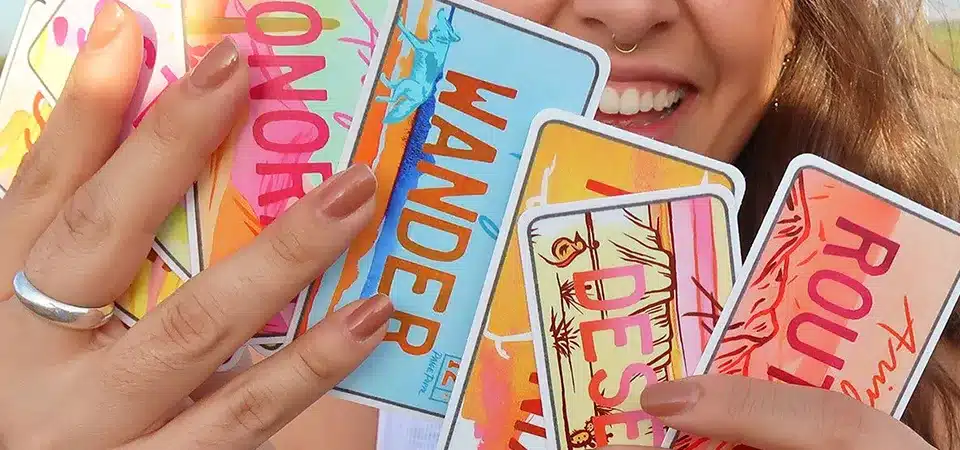
Your homemade stickers look great until they get wet. It's so frustrating to see your beautiful designs smudge, bleed, and fall apart from a single drop of water.
To print waterproof stickers at home, use inkjet waterproof vinyl paper, then seal the print with a protective layer. You can use self-adhesive laminating sheets, a thermal laminator, a clear spray sealant, or even wide packing tape for a simple, durable finish.
As someone who runs a professional sticker printing business, I know the secrets to making stickers that last. While my shop uses industrial equipment, you can get surprisingly great results right at home with the right materials and techniques. It all comes down to two key things: a water-resistant base and a waterproof shield on top. Let’s walk through exactly how you can do it.
What makes a sticker waterproof
You know you need a "waterproof" sticker, but what does that even mean? Is it the paper, the ink, or a special coating you add afterward?
A sticker becomes waterproof from a combination of non-absorbent base material (like vinyl) and a protective top layer that shields the ink from moisture. Both parts are essential for true durability.

In the sticker world, "waterproof" isn't a single feature—it's a system. You can't just use one special component and expect it to work. I always tell my clients that two things have to be right: the foundation and the shield.
The Right Sticker Paper
Your starting point is everything. Standard paper stickers are like a sponge; they absorb water, get mushy, and the ink runs everywhere. You must start with paper that doesn't absorb water. The best choices are waterproof inkjet vinyl or polyester sticker paper. These materials are essentially thin sheets of plastic. Water just sits on the surface instead of soaking in, so they won't fall apart when wet.
The Right Ink and Sealant
Next is the ink. Most home inkjet printers use dye-based inks, which are water-soluble. This means they will run when wet, even on waterproof paper. Pigment-based inks are much more water-resistant, but they can still smudge with enough friction and moisture. This is why a top coat, or sealant, is the final, most crucial step. This clear layer creates a permanent barrier, locking the ink in and keeping water out completely. The methods we'll cover are all ways to apply this protective shield.
What are the best materials for waterproof stickers?
Walking into a craft store or browsing online is confusing. There are hundreds of paper and sealant options. Choosing the wrong ones will ruin your project before you even start.
For the best results, start with inkjet waterproof vinyl sticker paper. Then, choose your sealant: self-adhesive laminate sheets, thermal laminating pouches, or a clear acrylic spray sealer. Each offers a different balance of durability and ease of use.

Over the years, I've tested countless supplies. For DIY projects, these are the materials that give you the most professional and reliable results. Think of your project as a simple recipe: you need a base, a print, and a sealant.
| Material Type | Best For | My Pro Tip |
|---|---|---|
| Waterproof Inkjet Vinyl Paper | Overall durability and a professional feel. | Look for a "glossy" finish for vibrant colors or "matte" for a modern look. |
| Waterproof Inkjet Polyester Paper | Extreme durability, often thinner than vinyl. | Great for labels that need to be tear-proof, but can be less flexible. |
| Self-Adhesive Laminating Sheets | A glossy, durable finish without needing a machine. | An essential, easy-to-use option for getting a professional shield. |
| Thermal Laminating Pouches | The most durable, heat-sealed finish. | Gives a rigid, super-protected feel, almost like a thin credit card. |
| Clear Acrylic Spray Sealant | Quick and easy application on many stickers at once. | Choose one labeled "UV-resistant" to prevent fading from the sun. |
Your choice of sealant is the most important decision. A self-adhesive sheet is a great all-arounder, while a thermal laminator offers maximum protection. Spray sealant is fast but offers the least physical protection from scratches.
Method 1 – Use self-adhesive laminating sheets
You want a professional, glossy finish but don't have a fancy laminating machine. Applying that big sticky sheet perfectly without bubbles and wrinkles seems impossible.
Print your stickers on waterproof paper, let the ink dry completely, and then carefully apply a self-adhesive laminating sheet over the top. Use a squeegee to smooth it out and eliminate air bubbles.

This is my favorite machine-free method because it gives a reliably beautiful and protective finish. The key is to work slowly and methodically. One wrong move and you can trap a bubble forever.
What you need
- Your printed stickers on waterproof vinyl paper
- Self-adhesive laminating sheets
- A squeegee or a sturdy credit card
- A flat, clean surface
Steps
- Print and Dry: Print your sticker sheet and let the ink dry for at least 15-30 minutes. Even on waterproof paper, fresh ink can smear.
- Prepare the Laminate: Cut a piece of the laminating sheet that is slightly larger than your sticker sheet.
- Peel a Small Edge: Peel back just one inch of the laminate's paper backing along the shortest edge. Fold the backing paper down.
- Align and Stick: Very carefully, line up that exposed sticky edge with the edge of your sticker sheet. Press it down firmly.
- Squeegee and Peel: This is the most important step. Hold the unpeeled part of the laminate up at an angle. Use your squeegee to slowly and firmly press the laminate down onto the sticker sheet, starting from the edge you just stuck. As you push the squeegee forward, slowly pull the paper backing out from underneath. This pushes the air out as you go.
- Trim: Once the entire sheet is covered, use scissors or a craft knife to trim the excess laminate from the edges.
Pros:
- No expensive machine required.
- Gives a professional glossy finish.
- Provides excellent waterproof and scratch protection.
Cons:
- It's very easy to trap air bubbles or dust.
- The sheet can be unforgiving; once it's stuck, it's hard to reposition.
Method 2 – Use a thermal laminating machine
You need your stickers to be extra tough and completely sealed against the elements. You're willing to invest in a machine for the most durable result possible.
For maximum durability, place your printed sticker sheet inside a thermal laminating pouch and run it through a thermal laminator. The heat activates the adhesive, creating a rigid, perfectly sealed, waterproof shell.

When a client needs stickers for outdoor equipment or anything that will take a serious beating, a method similar to this is what we use in our professional shop. The heat and pressure create a bond that is much stronger than a cold-applied adhesive. This method is the champion of durability.
What you need
- Your printed stickers on waterproof vinyl paper
- A thermal laminating machine
- Thermal laminating pouches (e.g., 3 mil or 5 mil thickness)
Steps
- Print and Dry: Print your sticker designs and let the ink cure completely.
- Arrange Your Stickers: If you've already cut your stickers out, arrange them inside the laminating pouch, leaving at least a quarter-inch of space between each one. If you are laminating a full sheet, simply place it inside.
- Preheat the Machine: Turn on your thermal laminator and wait for it to reach the correct temperature. Check your pouch's instructions for the right heat setting.
- Laminate: Place the "sealed" edge of the laminating pouch into the machine's feeder. Let the machine pull it through automatically. Don't push or pull it.
- Cool Down: The laminated sheet will be hot and very flexible when it comes out. Let it cool on a flat surface for a minute to harden.
- Cut: Cut out your stickers, leaving a small clear border around each one. This border ensures the waterproof seal remains intact.
Pros:
- Extremely durable and rigid.
- Perfectly bubble-free application every time.
- Completely waterproof and very scratch-resistant.
Cons:
- Requires purchasing a machine.
- The stickers become rigid and thick, which isn't always desirable.
- You must leave a clear edge around each sticker.
Method 3 – Apply spray sealant
You need to waterproof a large batch of stickers quickly and don't care about a thick, glossy finish. You're looking for a fast method that provides basic protection.
To use a spray sealant, lay your printed sticker sheets flat in a well-ventilated area. Hold the can about 10-12 inches away and apply a light, even coat over the entire surface. Let it dry completely.

This is the fastest method, but it's also the one that offers the least physical protection. I think of it as a "light-duty" waterproofing solution. It's great for things that might get an occasional splash but won't be submerged or heavily handled.
What you need
- Your printed stickers on waterproof vinyl paper
- Clear acrylic spray sealant (glossy or matte finish)
- A well-ventilated space, preferably outdoors
- A drop cloth or cardboard to protect your work surface
Steps
- Print and Dry: Print your sticker designs and make sure the ink is 100% dry.
- Set Up Your Space: Go outside or to a very well-ventilated room. Lay your sticker sheets flat on a protected surface.
- First Coat: Shake the spray can well. Holding it about 10-12 inches away from the paper, spray a very light, even coat. Use smooth, sweeping motions from side to side, slightly overlapping each pass. A light coat is better than a heavy one to avoid drips.
- Dry and Recoat: Let the first coat dry for about 20-30 minutes (check the can's instructions). Apply a second, and maybe even a third, light coat for best results. Let the sheets cure for several hours, or even overnight, before cutting.
Pros:
- Very fast and easy to apply to multiple sheets at once.
- Doesn't add any thickness or rigidity to the sticker.
- Available in different finishes like matte or gloss.
Cons:
- Provides minimal protection against scratches.
- Can have a strong odor and requires very good ventilation.
- The finish may feel slightly tacky if applied too heavily.
Method 4 – Use clear tape for DIY waterproofing
You're in a pinch and need to waterproof a single sticker right now. You don't have any special supplies, just basic items you'd find in a desk drawer.
For a quick DIY solution, you can cover your sticker with a layer of wide, clear packing tape. Smooth it down carefully to remove bubbles. This provides a decent waterproof barrier for light-duty use.

This is the ultimate sticker hack. It's not the most professional method, and it won't last forever, but it absolutely works when you need a quick fix. I've used this method myself for temporary labels around my workshop.
What you need
- Your printed (and cut out) sticker
- Wide, clear packing tape
- A credit card or your thumbnail
Steps
- Print and Cut: This method works best on stickers that are already cut to their final shape. Make sure your sticker is narrower than your tape.
- Apply the Tape: Cut a piece of tape that is slightly larger than your sticker. Carefully lay the tape over the sticker, trying to place the center down first.
- Smooth It Out: Use a credit card or your thumbnail to smooth the tape down and push out any air bubbles. Work from the center outwards.
- Trim (Optional): You can either trim the excess tape from around the sticker or just leave it for extra adhesion.
Pros:
- Extremely cheap and uses common household items.
- Very fast and easy for a single sticker.
- Surprisingly effective against water.
Cons:
- Looks homemade; you can often see the tape edges.
- The tape's adhesive may yellow over time.
- Not very durable against scratches or heavy use.
How do you cut waterproof stickers after protecting them?
You've successfully printed and laminated a whole sheet of stickers. Now it's just one giant sheet. How do you cut them out neatly without ruining all your hard work?
For perfect cuts, use a craft cutting machine like a Cricut or Silhouette. For manual cutting, a sharp craft knife and a ruler are best for straight lines, while sharp scissors work for simple shapes.

Cutting your laminated stickers is the final step to a professional result. The added thickness of the laminate means you need a sharp blade and a steady hand.
Method 1: Using a Cutting Machine
This is how we get perfect custom shapes in my shop. If you have a Cricut or Silhouette, use its "Print Then Cut" feature. After you've laminated your printed sheet, place it on the cutting mat. The key is to increase the pressure setting. Because you've added a layer of laminate, the default "vinyl" setting won't be strong enough. You may need to use a "heavy cardstock" setting or create a custom material profile that cuts twice in the same spot. This ensures the blade gets cleanly through both the laminate and the vinyl.
Method 2: Cutting by Hand
If you're cutting by hand, precision is your goal.
- For Straight-Edged Stickers: Use a sharp craft knife (like an X-Acto knife), a metal ruler, and a self-healing cutting mat. This will give you perfectly straight, clean lines that scissors can't match.
- For Custom Shapes: For simple curves or shapes, a pair of sharp, non-stick scissors will work. Go slowly and make your cuts as smooth as possible. For intricate shapes, a craft knife is still the better tool, but it requires patience.
Conclusion
With waterproof paper and a sealant like laminate or spray, you can easily create beautiful, durable stickers at home that last. Just choose the method that fits your budget and needs.