You need professional-looking sticker sheets for your store, but the ordering process seems full of technical traps. A single mistake could ruin your entire batch and waste your money.
To order die-cut sticker sheets, first, choose your specifications like size and material. Next, send your high-resolution artwork with clear instructions for the cutlines. Finally, carefully review the digital proof from the printer before approving it for production.
As a sticker printing expert, I see these orders come through my shop every single day. The difference between a perfect, shelf-ready sticker sheet and a disappointing one almost always comes down to preparation. Getting the technical details right before you order is the most important part of the process. I want to walk you through the exact three-step system we use to ensure our clients get professional, consistent results that look great in any retail environment. It's simpler than you think once you know what to look for.
Step 1: Choose your sticker sheet specifications
You're ready to order, but the list of options is overwhelming. Choosing the wrong size or material feels like a costly mistake waiting to happen, making your brand look unprofessional.
First, decide the final sheet size and the quantity you need. Then, select a durable material like white plastic with a semi-gloss finish. Lastly, confirm you need "die-cut" stickers, meaning each sticker on the sheet is cut individually.

Choosing the right specifications is the foundation of a great sticker sheet. It's not just about how it looks, but also how it holds up in a real-world retail environment where it will be handled by customers. I always guide my clients through these three key choices to make sure we build a product that's both beautiful and tough enough for the job.
Size, Material, and Cut Type
The first decision is always about the physical product. These choices will affect your cost, your display options, and how customers perceive your brand.
-
Size and Quantity: Think about where your sticker sheets will be displayed. Will they hang from a hook? In that case, adding a hole-punched top area is a great idea. Will they sit in a bin on a counter? A smaller, more compact sheet size like A6 or A7 might be better for impulse buys. I once had a coffee shop client who wanted huge A4 sheets, but we realized smaller A6 sheets fit perfectly next to the register and sold much better. It's about matching the product to the environment. Ordering a larger quantity will lower your price per sheet, but make sure you have the demand for it first.
-
Material and Finish: For retail, durability is non-negotiable. Paper stickers tear and fade easily. I always recommend a durable vinyl or PET material (white plastic). They resist tearing, water, and fading from store lights. The finish is just as important. From my experience, a semi-gloss finish is the best for retail. It keeps colors vibrant and rich but doesn't have the harsh glare of a full gloss finish, making it look premium under any lighting.
| Finish Type | Retail Environment Performance | Why it Works |
|---|---|---|
| Matte | Good | No glare, feels high-end and modern. Can make colors look slightly muted. |
| Semi-Gloss | Excellent (Recommended) | Reduces glare while keeping colors vibrant. The perfect balance for retail. |
| High Gloss | Fair | Very vibrant, but can have a strong glare under store lights, making it hard to see. |
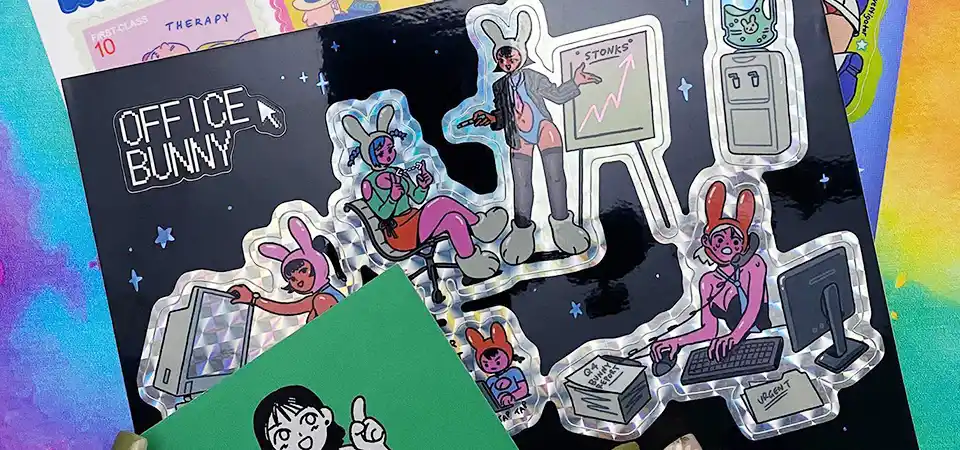
- Cut Type: It's important to be clear here. You are ordering die-cut sticker sheets. This means the sheet itself is a standard shape (like a rectangle), but the individual stickers on the sheet are cut to their unique custom shapes. This allows your customers to peel off each sticker easily.
Step 2: Send your artwork
You have a perfect design, but you're afraid sending the wrong file type will result in a blurry or misaligned print. The technical jargon feels like a barrier to getting what you want.
Send your artwork as a high-resolution file, at least 300 dpi. Compatible formats include PNG, PDF, or AI. Most importantly, provide clear instructions for the designer, especially by including a separate vector cutline for your stickers.

This is the step where most mistakes happen, but it's also the easiest one to get right with a little guidance. As a printer, receiving a well-prepared file is a dream. It means we can move to production quickly and deliver a perfect product. The goal is to leave no room for guesswork.
The All-Important Artwork File
Providing a print-ready file is your responsibility, and it has two main parts: the artwork itself and the instructions for how it should be cut.
-
File Format and Resolution: Your artwork needs to be high-resolution. The industry standard for clear, crisp printing is 300 dpi (dots per inch). Anything lower can look pixelated or blurry. We can accept many file types like PNG, JPEG, PDF, or SVG, but vector files are always the best. Vector files, like those made in Adobe Illustrator (AI or EPS), can be scaled to any size without losing quality.
-
The Cutline and Safety Margin: This is the most critical part. The cutline is an invisible line that tells our cutting machine where to slice each sticker. The most common mistake I see is when the artwork and cutline are not properly aligned. For the best results, you should provide the cutline as a separate vector line in your file. This ensures absolute precision. And just as important, keep all critical parts of your design—like text or logos—at least 3 mm inside the cutline. This is your "safety margin." It guarantees that even if there's a microscopic shift during the cutting process, no part of your important design will be accidentally trimmed off.
| Artwork Best Practice | Why It's Important |
|---|---|
| 300 dpi Resolution | Guarantees your printed sticker will be sharp and not blurry. |
| Vector Cutline (AI, EPS) | Provides the most precise instructions for the cutting machine, preventing uneven cuts. |
| 3mm Safety Margin | Protects your essential design elements from being trimmed off during cutting. |
Step 3: Finalize and place your order
The printer sent you a "digital proof," and you're not sure what you're supposed to do. You're worried about approving a mistake that will be permanently printed on hundreds of sheets.
Review the digital proof very carefully. Check the layout, cutlines, spelling, and colors. Once you are 100% happy, approve it to start printing. If you see any issues, request edits. Do not approve until it's perfect.

The digital proof is your final safety net. It's a digital mockup showing exactly how your finished sticker sheet will look. I cannot stress this enough: once you approve the proof, changes cannot be made. The order immediately goes to the printing and die-cutting machines. Taking a few extra minutes to review the proof with a checklist can save you from a major headache.
Your Final Checklist Before Printing
Think of yourself as the final quality control inspector. I once had a client who was about to approve an order for 5,000 sheets before they noticed a single letter was missing from their brand name on one sticker. That careful review saved them thousands of dollars. Before you click "Approve," check these things:
| Proofing Checklist | What to Look For |
|---|---|
| Cutlines | Are the cutlines perfectly tracing the edge of each sticker? Are they smooth and accurate? |
| Spelling & Grammar | Read every single word on the sheet. Are there any typos? |
| Arrangement & Layout | Are the stickers arranged on the sheet exactly as you wanted them? Is the spacing correct? |
| Colors | Do the colors look right? Remember that colors on your screen (RGB) can look slightly different from printed colors (CMYK). |
| Dimensions | Does the proof confirm the final sheet size is correct? |
Once you've checked everything and it's perfect, you can approve the proof and complete the checkout process. Then, it's our turn to bring your vision to life.
Conclusion
Ordering die-cut sticker sheets is easy. Just choose your specs carefully, prepare your artwork with a clear cutline, and most importantly, triple-check your digital proof before giving the final approval.


