Skip to content
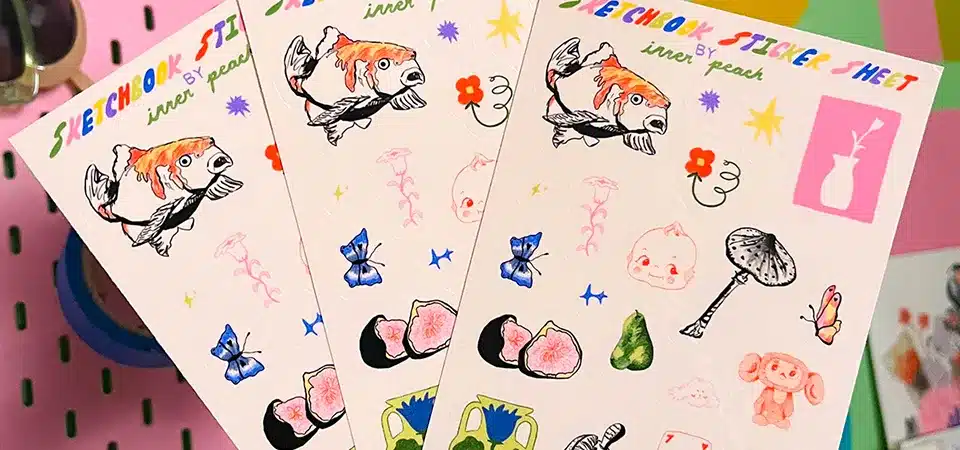
Want to create beautiful, custom sticker sheets but find the process intimidating? You risk wasting expensive paper and ink on misaligned cuts and blurry prints if you don't know the right steps.
Making sticker sheets involves designing your layout, adding cut lines for your machine or hand-cutting, printing on sticker paper, and then cutting. For best results, plan your layout with proper spacing, use high-quality paper, and calibrate your cutting machine.
It might sound like a lot of steps, but I promise it's easier than you think once you break it down. As someone who handles professional sticker production every single day, I know all the little tricks that separate a messy, homemade-looking sheet from a crisp, professional one. This guide will walk you through the entire process, from design to the final cut.
What tools and materials do you really need?
You're ready to start, but your shopping list is a mile long. It's confusing to know what's truly essential versus what's just a nice-to-have gadget that will collect dust.
To make sticker sheets, you absolutely need design software, an inkjet printer, sticker paper, and a cutting tool (like a Cricut or scissors). Optional items like a self-healing mat and laminate sheets can improve the quality.

In my print shop, we use industrial-grade equipment, but the core principles are the same for DIY projects. The quality of your final sticker sheet comes down to the quality of your materials and the precision of your cut. You don't need the most expensive gear to start, but investing in good paper and understanding your tools is key. Here's a realistic breakdown of what you'll need to get started.
| Item | Essential or Optional? | My Professional Advice |
|---|---|---|
| Design Software | Essential | Start with something free like Canva or use Procreate if you have an iPad. For total control, Adobe Illustrator is the best. |
| Inkjet Printer | Essential | You don't need a fancy photo printer. A standard color inkjet printer works perfectly. Just be sure to use the correct print settings for your paper. |
| Sticker Paper | Essential | This is crucial. Cheap paper can smear or jam. I recommend starting with a quality matte or glossy vinyl sticker paper for durability. |
| Cutting Machine | Optional (but recommended) | A Cricut or Silhouette machine gives you a "kiss cut" for that professional peel. It's a game-changer. |
| Scissors/Craft Knife | Essential (if not using a machine) | For hand-cutting, you'll need a sharp craft knife or precision scissors to get clean lines on your stickers. |
| Laminate Sheets | Optional | Adding a clear laminate layer before cutting makes your stickers waterproof and scratch-resistant. Highly recommended for durability. |
| Cutting Mat/Ruler | Optional | A self-healing mat and a metal ruler are lifesavers if you're cutting by hand, ensuring straight and safe cuts. |
Step 1: How do you design your sticker sheet layout?
You have your artwork, but arranging it on a sheet feels like a frustrating game of Tetris. If you don't plan your layout correctly, you'll waste paper and end up with poorly spaced stickers.
To design your sheet, use software to arrange your art on a canvas set to your paper's size (e.g., A4 or US Letter). The key is to leave 3-4mm of space between each sticker and around the edge.

Planning the layout is the most important step, in my opinion. This is where you determine how clean and professional your final sheet will look. In our factory, everything is automated, but the layout rules are the same. Good spacing prevents the cutting blade from tearing the vinyl and ensures each sticker peels perfectly.
Choose your software
Your choice of software depends on your budget and skill level. Adobe Illustrator is the professional choice because it uses vectors, meaning your art stays crisp at any size, and creating cut lines is easy. For artists, Procreate on the iPad is fantastic for drawing designs, but make sure your canvas is set to at least 300 DPI to ensure high-resolution printing. For beginners, Canva is a great, user-friendly option for arranging existing images and text.
Create or upload your art
Once you're in your software, you can either create your designs from scratch or upload existing files (like PNGs with transparent backgrounds). If you're creating new art, work on separate layers. This will make it much easier to separate your artwork from your cut lines later on.
Arrange on your sheet
Create a new file that matches your sticker paper size (e.g., 8.5" x 11"). Now, start placing your designs. Remember the golden rule: leave a margin of at least 3-4mm around the edge of the sheet and a gap of at least 2-3mm between each individual sticker. This space is non-negotiable for a clean cut, whether you're using a machine or scissors.
Step 2: How do you create the perfect cut lines?
Your designs look great, but you don't know how to tell your machine where to cut. Without proper cut lines, you'll get a simple square cut around each sticker instead of a custom shape.
To create a clean "kiss cut," you need to add a cut line (or offset) around your artwork. This is a separate vector path that the cutting machine follows, distinct from your printed design.

This is the secret behind stickers that peel off the sheet perfectly while leaving the backing paper intact. We call this a "kiss cut." Your printer only sees the artwork, while your cutting machine only sees the cut line. They must be set up correctly.
For Cricut or a cutting machine
In software like Cricut Design Space or Silhouette Studio, you'll upload your flattened artwork (as a PNG or JPG). Then, you use the "Offset" tool to automatically generate a border around your design. This offset is your cut line. In a more advanced program like Adobe Illustrator, you would manually create this vector path on a separate layer, often naming it "CutContour" and setting it as a spot color so our machines can recognize it.
For hand-cutting
If you're using scissors or a craft knife, the process is simpler. You can add a very faint, light gray outline around your artwork. This line won't be very noticeable on the final sticker but gives you a perfect guide to follow as you cut. For this method, simpler shapes like circles and squares will be much easier to cut cleanly than complex designs.
Step 3: How do you download your file correctly?
You've finished your design but now face a dozen confusing file formats. Saving your project incorrectly can result in blurry prints, missing cut lines, or files that simply won't open.
If you're using a cutting machine, save your design as a high-resolution PNG with a transparent background. If cutting by hand, save it as a Print-Ready PDF to preserve quality.

The way you save your file is critical for communicating with your printer and cutter. I've seen countless projects delayed because a customer sent a low-resolution JPG when we needed a layered file. Getting this step right saves everyone a headache.
If you’re using a cutting machine
For Cricut's "Print Then Cut" feature, a PNG with a transparent background is ideal. This allows the software to easily detect the edges of your design to create the offset cut line. You don't need to include the cut line in your saved file; you will add that inside the machine's software. Make sure you export at 300 DPI.
If you’re cutting by hand
A high-quality PDF is your best bet. A PDF embeds the images and fonts and preserves the print quality, ensuring your designs look exactly as they did on your screen. When you save, choose the "High Quality Print" or "Press Quality" preset if available.
Quick tip
Before saving your final version, always do a test print on a regular piece of paper. This allows you to check for any pixelation, alignment issues, or colors that look different on paper than on your screen, without wasting your expensive sticker paper.
Step 4: How do you print your sheet without issues?
You're nervous to hit "print," fearing the colors will be wrong or the ink will smudge. Printing on special sticker paper can be tricky, and one wrong setting can ruin a whole sheet.
To print your sheet correctly, load your sticker paper into your inkjet printer one sheet at a time, and in the print settings, choose the right paper type (e.g., "Glossy Photo Paper" or "Other Specialty Paper").

Printing is where your digital design becomes a physical product. In my business, our printers are calibrated daily, but for a home setup, the most important thing is your print settings. The printer needs to know what kind of paper it's using to apply the right amount of ink and prevent smudging. Don't just use the default "Plain Paper" setting. Look for an option that matches your sticker paper's finish. If your printer has a quality setting, choose "High" or "Best." After printing, let the ink dry completely for a few minutes before touching it or moving to the cutting step. If you're adding a laminate sheet, now is the time to carefully apply it over your printed design before you cut.
Step 5: How should you cut your stickers?
You have your printed sheet, but the final cutting step is where it could all go wrong. A crooked cut can ruin a perfect design, whether you're using a machine or your own hands.
For a cutting machine, follow the "Print Then Cut" instructions, ensuring the machine scans the registration marks correctly. If cutting by hand, use a sharp craft knife or precision scissors and take your time.

This is the moment of truth! A clean cut is the finishing touch that makes a sticker sheet look amazing. Precision is everything here.
Cut your project using Cricut Design Space
After printing your sheet with the black registration marks around the edge, place it on your machine's cutting mat, aligning it carefully. In Design Space, select the correct material setting to match your paper (e.g., "Printable Vinyl"). The machine will use its sensor to scan the registration marks, figure out exactly where your designs are printed, and then perform a perfect kiss cut around each one.
Cutting by hand
Place your sheet on a self-healing mat. If you're using a craft knife and ruler for straight-edged stickers, press down firmly on the ruler and make a confident cut. For custom shapes, use precision scissors or carefully trace the guide lines you printed with a craft knife. Go slow, rotate the paper instead of your cutting hand for curves, and remember that patience leads to a much cleaner result.
What are some extra tips for better sticker sheets?
You've mastered the basics, but now you want to elevate your sticker sheets. You're looking for those insider tips that will make your products look truly professional and unique.
To improve your sticker sheets, use high-quality vinyl paper with a laminate overlay for durability, experiment with unique layouts, and add your branding (like a logo or social media handle) directly onto the sheet.

This is where you can get creative and make your sticker sheets stand out. The little details matter. Here are a few pro tips I've learned over the years:
- Laminate for Longevity: Applying a clear self-adhesive laminate (glossy, matte, or even holographic) before cutting makes your stickers waterproof, UV-resistant, and feel much more premium.
- Brand Your Sheet: Don't waste the space! Add your brand logo, website, or social media handle to the bottom or top of the sticker sheet. It's free marketing.
- Tell a Story: Instead of random designs, create a themed sheet. A "coffee lover" sheet or a "spring garden" sheet feels more like a cohesive product.
- Mix and Match: Use a variety of sticker sizes on one sheet. Include a few large "hero" stickers and several smaller, decorative ones. This provides more value to the user.
- Back Printing: If you're ordering professionally, ask about printing on the back of the sticker sheet. You can add your branding, instructions, or a fun message there.
Want custom sticker sheets without the work?
You love the idea of custom sticker sheets, but the DIY process seems too time-consuming. You'd rather focus on your designs and business than on troubleshooting printers and cutting machines.
For professional, hassle-free sticker sheets, you can upload your design directly to a printing service. We handle the technical setup, printing, and cutting on industrial equipment, delivering a perfect product every time.
Let's be honest: while DIY is fun, it takes time and has a learning curve. As a business owner, your time is your most valuable asset. That's where we come in. At Sticker Printing China, we specialize in taking your design and turning it into a flawless physical product. You don't have to worry about paper jams, smeared ink, or misaligned cuts. We use premium vinyls, high-end printers, and precise laser cutters to ensure every sheet is perfect. With low minimums, it's an affordable way to get a professional product without the DIY effort, so you can focus on what you do best—creating.
FAQs
What type of sticker paper works best for printing at home?
For durable, high-quality stickers, I recommend printable vinyl sticker paper. It's more water-resistant and tear-proof than standard paper-based options. It comes in both matte and glossy finishes. Be sure to buy paper that is compatible with your printer type (inkjet or laser).
Can I use a sticker maker instead of a Cricut or scissors?
Yes, you can use a manual sticker maker (like the Xyron). These devices apply adhesive to your cut-out designs. However, they don't cut the stickers. You would still need to cut out your designs by hand first, and you won't be able to achieve a "kiss cut" sheet.
How do I set up a Cricut Print job without messing up the alignment?
The key is calibration. Before your first big project, run the "Print Then Cut" calibration process in Design Space. This teaches your machine exactly where to cut relative to the printed registration marks. Also, ensure you have good lighting in your room so the machine's sensor can see the marks clearly.
What’s the best way to cut a sheet with multiple small stickers?
A cutting machine like a Cricut or Silhouette is by far the best way. Their precision is unmatched for small, intricate designs. If cutting by hand, use a very sharp craft knife and a steady hand, and stick to simpler shapes for the smaller stickers to avoid frustration.
Can I fit all my designs on one sheet without crowding them?
Yes, but you must respect the spacing rules. Always leave 2-3mm of space between each sticker. To maximize space, try rotating your designs to see how they nest together best, like a puzzle. Good layout software can help you arrange them efficiently.
Conclusion
Making sticker sheets is a rewarding DIY project. With the right design planning, quality materials, and a precise cutting technique, you can create amazing custom products right from your desk.