
What are Transfer Stickers?
Definition and Composition:
Transfer stickers, as the name suggests, are designed to transfer graphic designs from the sticker surface to another surface with precision. Unlike traditional adhesive stickers, transfer stickers utilize a special adhesive and backing film, allowing the design to be accurately "transferred" onto various surfaces. This unique design makes transfer stickers ideal for fine details and personalized decorations.
How It Works:
The operation of a transfer sticker involves a combination of the front film, adhesive layer, and backing paper. When pressure is applied to the sticker, the design on the adhesive layer firmly adheres to the target surface, while the front film is easily removed after the transfer. This process requires high precision, making every step essential for achieving a flawless result.
The Science Behind Transfer Stickers: How They Work
The Role of Adhesive:
The key to transfer stickers lies in the adhesive on their back. Commonly, transfer stickers use either removable or permanent adhesives. Removable adhesives are ideal for applications that require frequent changes or repositioning, while permanent adhesives are used for designs that need to stay fixed for the long term, ensuring the sticker adheres securely and doesn’t peel off.
Physical and Chemical Principles:
Transfer stickers work through the molecular attraction of the adhesive, which transfers the design from the paper to the target surface. By applying pressure, a chemical reaction occurs between the adhesive and the target surface, allowing the design to stick firmly and resist peeling. This process doesn’t rely on heat, making it suitable for a wide variety of surfaces like glass, wood, metal, and more.
Heat Transfer vs. Cold Transfer:
Among the different types of transfer stickers, heat transfer and cold transfer are the most common. Heat transfer stickers require high temperatures to soften the adhesive and enhance its bonding strength. On the other hand, cold transfer stickers rely on pressure instead of heat, allowing the design to transfer clearly and evenly to the surface.
Applications of Transfer Stickers: How to Use Them in Daily Life
Home Decor:
Transfer stickers have a wide range of applications in home decoration, especially for wall art, custom furniture, and window decals. These stickers make it easy to create artistic wall designs or breathe new life into old furniture. Their convenient application process makes them an essential tool for DIY home projects.
DIY and Customization:
For DIY enthusiasts, transfer stickers are an indispensable creative tool. Whether it’s customizing t-shirts, phone cases, or decorative items, transfer stickers can easily add personalized designs to any object, turning ordinary pieces into one-of-a-kind creations.
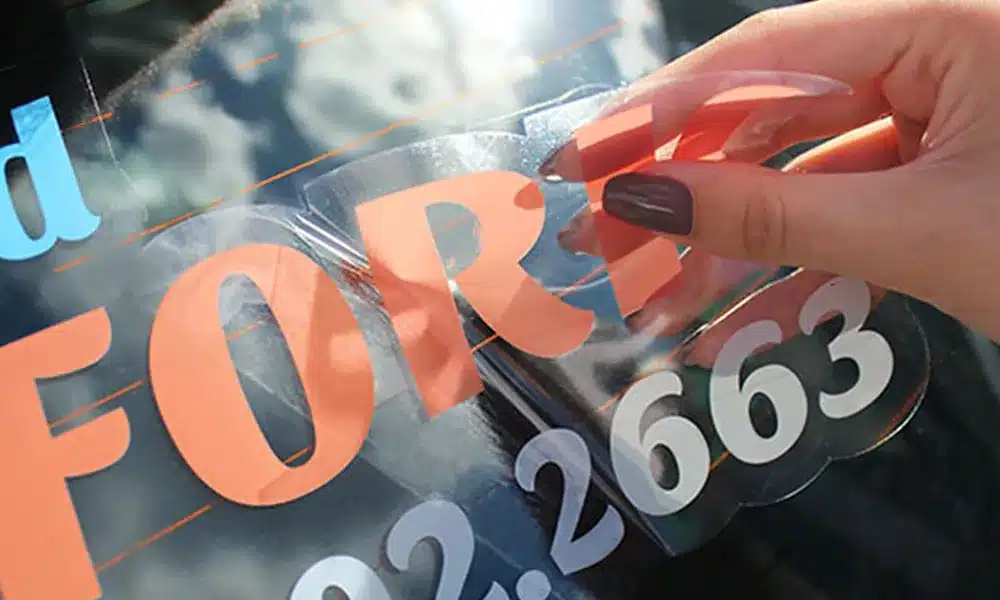
Car and Vehicle Decoration:
Car owners often use transfer stickers to personalize their vehicles, especially for custom logos, text, or graphics on windows and body panels. These stickers not only enhance the appearance of the car but also serve as a great way to stand out in advertising campaigns.

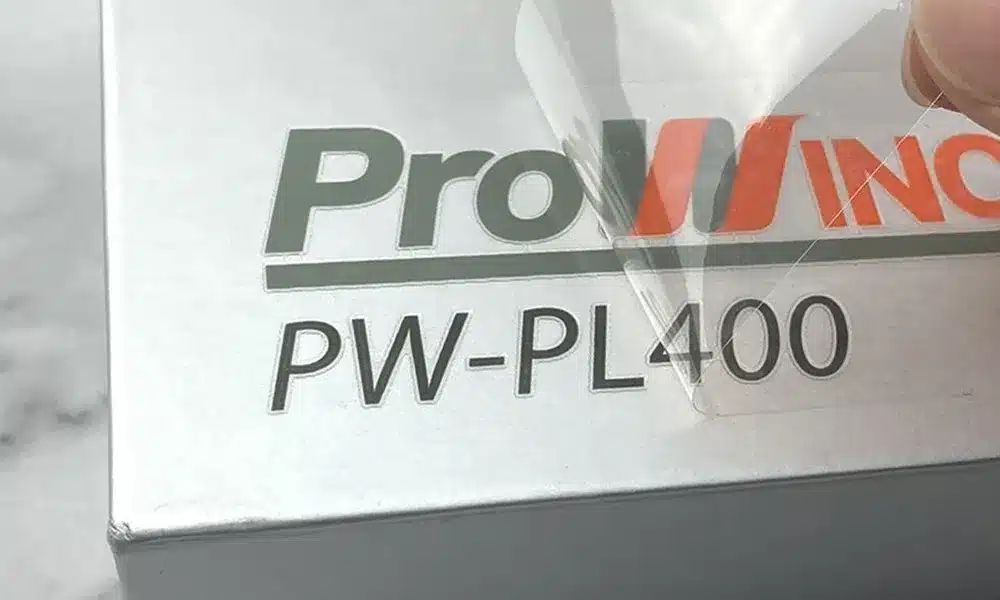
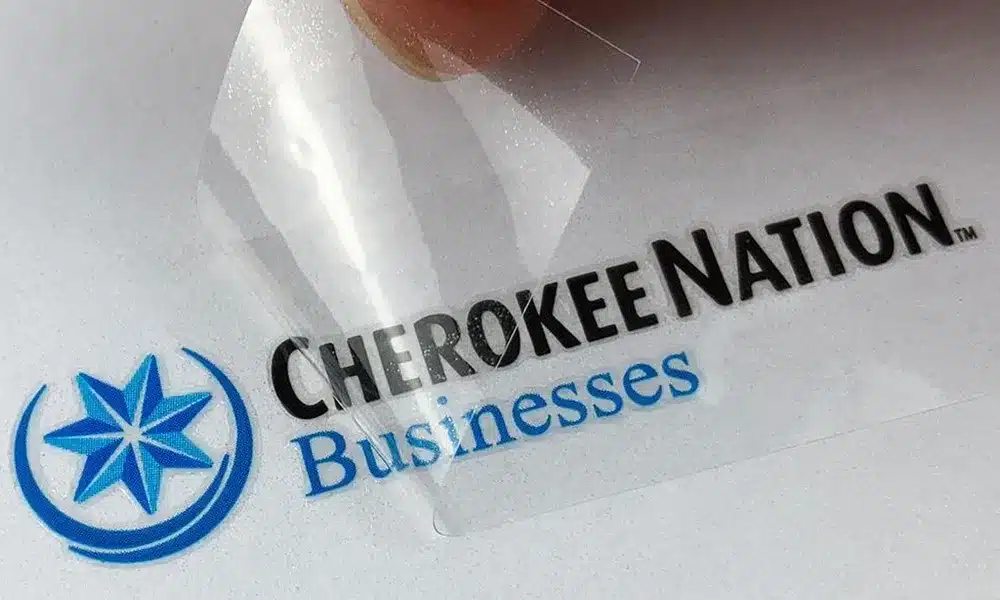
Brand Promotion and Commercial Advertising:
For businesses, transfer stickers are a low-cost and effective advertising tool. Whether for storefront windows, product packaging, or employee uniforms, transfer stickers help convey brand messages to customers and boost brand recognition. They are a powerful way to spread brand identity in a visually engaging way.
How to Make Professional Stickers: A Full Process from Design to Production
Creating a professional sticker, especially high-quality transfer stickers, involves a series of meticulous steps in design, printing, and post-production processes. Whether for personal customization or commercial use, understanding this process will help you better control the quality and ensure the final product meets your expectations.
Step 1: The Design Phase
Before making professional stickers, the first step is to design the graphic or text that will be transferred. This phase is crucial, as a good design directly impacts the sticker's visual appeal and effectiveness.
1.1 Design Software Choice: Most professional designers use software like Adobe Illustrator, Photoshop, or CorelDRAW. Vector graphics are essential because they offer infinite scalability without distortion, which is particularly important for sticker production, especially when dealing with complex designs or larger sizes.
1.2 Design Specifications:
- Resolution: Ensure the resolution of the design is high enough; generally, 300dpi is the best choice to ensure the printed design is sharp and clear.
- Color Mode: Use CMYK mode instead of RGB, as CMYK is more suitable for printing processes and ensures accurate color representation.
- File Format: After the design is complete, save it in a printer-friendly format like PDF, EPS, or AI.
1.3 Design Elements: Keep the design simple yet visually engaging. Overly complex designs can affect the transfer quality, as tiny details may be hard to replicate. It’s advisable to avoid using too much small text or fine details, especially on smaller stickers.
Step 2: Choosing the Right Materials
Selecting the appropriate materials is key to producing high-quality professional stickers. The material choice affects the sticker's durability, visual appeal, and the scenarios in which it can be used.
2.1 Sticker Paper Types: Common transfer sticker materials include:
- Vinyl: Vinyl stickers are extremely durable and resistant to UV rays and water, making them ideal for long-term outdoor use, such as car decorations or outdoor advertising.
- Paper Stickers: Suitable for short-term use or indoor environments, paper stickers are cost-effective and work well for product labels, custom gifts, and other temporary applications.
- Transparent Stickers: Transparent vinyl stickers create a seamless background effect, giving the design a modern and refined look, perfect for logos, window decals, and other branding purposes.
2.2 Adhesive Types: Depending on the intended use, different adhesives are chosen:
- Permanent Adhesive: Used for stickers that need to remain in place for an extended period. Common in commercial advertising and outdoor applications.
- Removable Adhesive: Ideal for stickers that need to be changed or repositioned, often used for indoor wall decor or temporary signage.
2.3 Backing Film Selection: The backing film is an essential part of transfer stickers. It helps keep the design intact during the transfer process and allows for easy removal. Choosing high-quality backing film ensures the design transfers cleanly and without damage.
Step 3: Printing and Cutting
Printing and cutting are the core steps in sticker production, ensuring the design is accurately replicated and meets the required standards.
3.1 Printing Process:
- Digital Printing: Digital printing is an efficient and flexible printing method, especially for small batches. It doesn’t require traditional printing plates and directly prints the design onto the sticker material via computer. Digital printing achieves high-precision detail and offers a wide range of color options.
- Screen Printing: For large-volume production, screen printing is a cost-effective method. Ink is applied layer by layer through a mesh screen, making it ideal for simple designs or large solid areas of color. This method is especially efficient for bulk production.
3.2 Cutting: The cutting process defines the shape and edges of the sticker. Common cutting methods include:
- Laser Cutting: Laser cutting is a precise technique that allows for the creation of intricate and detailed designs, making it ideal for complex artwork.
- Blade Cutting: Computer-controlled blade cutters provide high precision, especially for straight lines or regular shapes. Blade cutting is suitable for small to medium batches of stickers.
Step 4: Laminating and Edge Sealing
For outdoor-use stickers, lamination and edge sealing are typically performed after printing and cutting. Lamination not only enhances durability but also improves the visual appeal of the stickers.
4.1 Protective Lamination: After printing, a transparent protective laminate is applied to the sticker surface. This protects the design from scratches, dirt, and fading. Depending on the desired effect, you can choose between glossy or matte finishes for the lamination.
4.2 Edge Sealing: Edge sealing helps prevent the sticker’s edges from peeling or getting damaged. After cutting, the edges can be sealed using heat or adhesive technology to improve the sticker’s longevity and durability.
Step 5: Testing and Quality Control
After production, it's essential to test each batch of stickers to ensure they meet the desired standards. The quality control process includes:
- Adhesion Test: Ensure the stickers adhere firmly to the target surface, especially for irregular or textured surfaces.
- Weather Resistance Test: For outdoor stickers, tests like UV resistance, water resistance, and heat resistance are conducted to ensure they won't fade or deteriorate under various environmental conditions.
- Print Quality Check: Inspect the print clarity and color accuracy to ensure there are no color discrepancies or blurry areas in the design.
Step 6: Packaging and Delivery
Once the stickers are made, they must be properly packaged to ensure they reach their destination safely. Common packaging methods include:
- Individual Packaging: For custom or small-batch stickers, each sticker can be individually packaged to ensure it arrives undamaged.
- Bulk Packaging: For large-volume production, stickers are typically packaged in bulk based on design type, making them suitable for wholesale or retail purposes.
How to Use Transfer Stickers Like a Pro: A Step-by-Step Guide
Step 1: Preparation
Before applying a transfer sticker, it's essential to clean the target surface. Whether it’s a wall, wood, glass, or metal, make sure the surface is free of dust, grease, or any other impurities. Use a damp cloth to clean the surface and ensure it is completely dry before proceeding.
Step 2: Align the Design
Position the transfer sticker on the target surface. If you need to ensure perfect placement, use a ruler or masking tape to mark the spot, ensuring the design is correctly aligned before pressing it down.
Step 3: Apply the Transfer Sticker
Start at one edge of the sticker and gently press it onto the surface. Use a squeegee or credit card to lightly push the sticker down, ensuring it sticks firmly. This step requires patience to avoid air bubbles or wrinkles. Work slowly to ensure a smooth application.
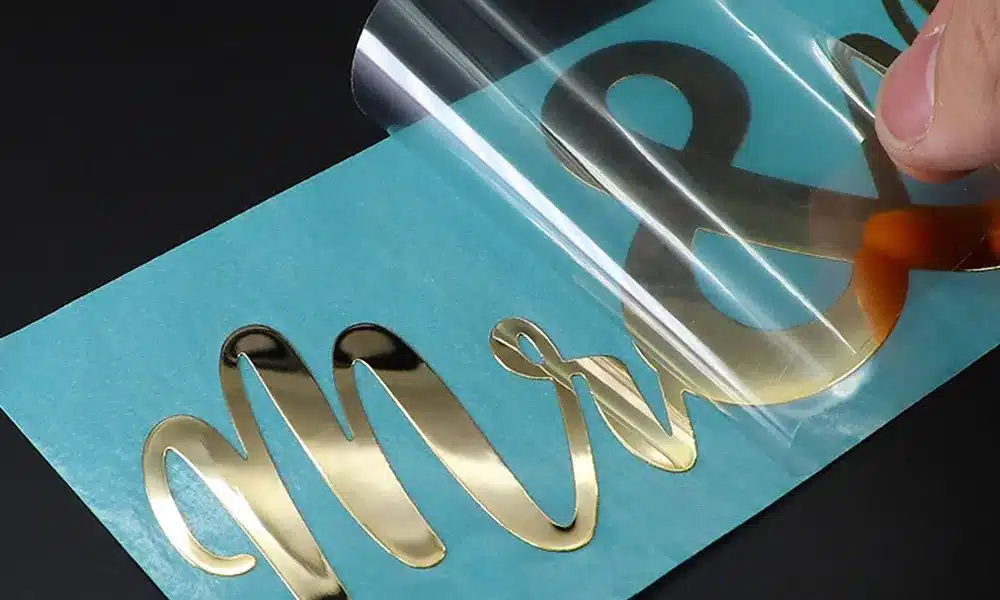
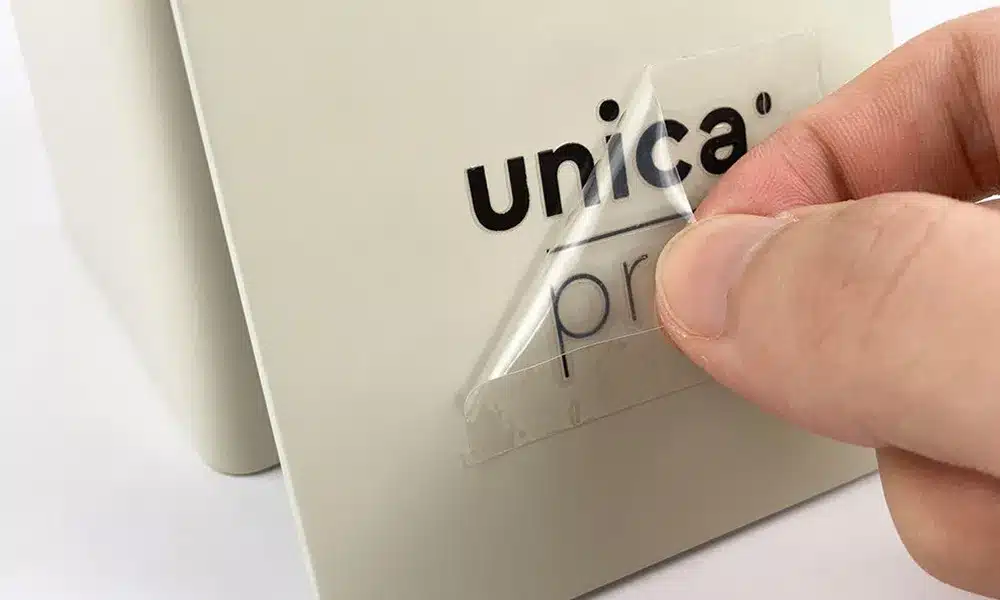
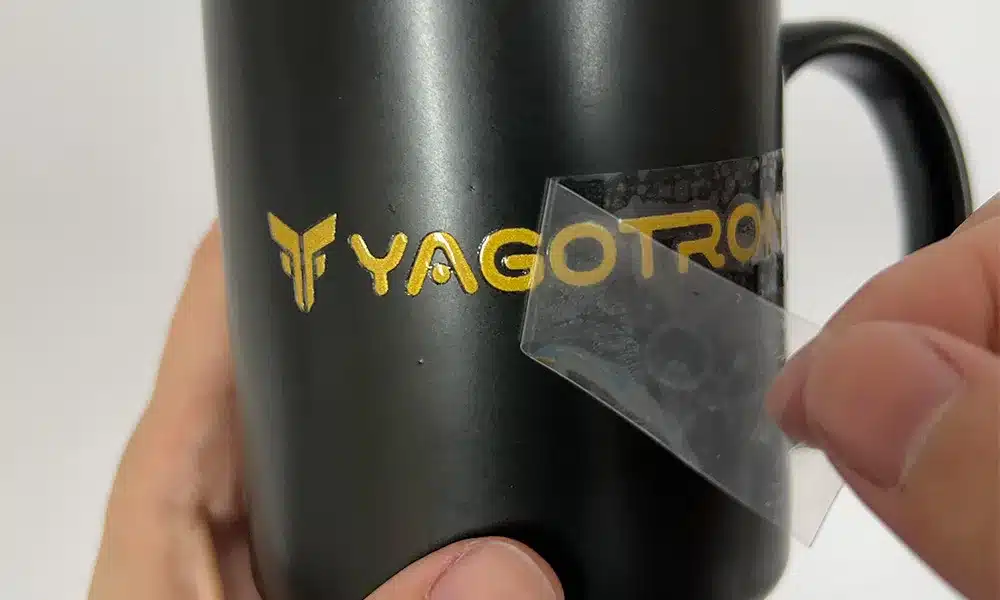
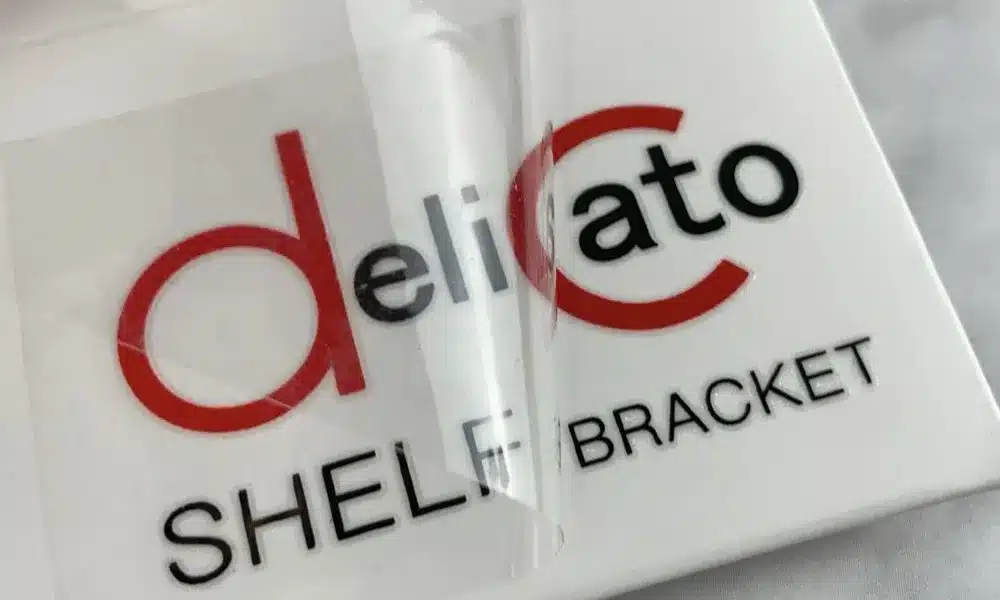
Step 4: Remove the Front Film
After the transfer, carefully peel off the front film. Ensure that the design is securely attached to the target surface. If the design hasn't fully transferred, apply more pressure until the sticker fully bonds with the surface.
Step 5: Inspect the Transfer
Check the final result to ensure there are no bubbles or wrinkles in the design. If you spot any minor issues, you can use a pin to pop air bubbles or reposition the design carefully.
Transfer Stickers vs. Regular Stickers: Which One Is Right for You?
Adhesive Comparison:
Regular stickers typically have stronger adhesives that make them hard to remove once applied. On the other hand, transfer stickers use a lighter adhesive that makes them easier to remove and reposition. Removable transfer stickers, in particular, are perfect for applications where you may need to adjust or replace them without damaging the surface.
Surface Suitability:
Regular stickers are best suited for smooth surfaces, while transfer stickers can adhere to a wider range of surfaces, including irregular shapes and rough textures. This makes transfer stickers ideal for high-precision applications, such as intricate text or complex designs.
Design and Detail:
Transfer stickers are known for their fine, intricate designs that can transfer cleanly onto various materials and surfaces, making them perfect for detailed logos or small text. Regular stickers, on the other hand, tend to feature simpler designs that are great for quick, straightforward applications.
Best Surfaces for Transfer Stickers: Where Do They Work Best?
Smooth Wood and Metal:
Transfer stickers work best on smooth wood and metal surfaces. These surfaces are flat, free from excessive texture or pores, and offer better adhesion, ensuring the transfer process is seamless.
Glass and Plastic:
Glass surfaces are also ideal for transfer stickers due to their smooth, even texture. Plastic surfaces are perfect for small items like phone cases, bottles, and more. However, you may need special adhesive for certain plastics to ensure the sticker sticks well.
Walls:
When applying transfer stickers to walls, it’s crucial to choose products designed specifically for wall surfaces. Wall materials vary, and using wall-specific transfer stickers ensures easy removal without damaging the paint or surface.
Can Transfer Stickers Be Removed and Reused?
Reusability:
High-quality transfer stickers are often removable and reusable. Especially removable adhesives can retain their sticking power even after being peeled off and repositioned multiple times. Keeping the sticker clean and intact is key to its reusability.
How to Remove:
To remove a transfer sticker, gently heat the adhesive to soften it. This prevents the surface from peeling off with the sticker. Using a hairdryer or heat pad can help make removal smoother without damaging the surface.
Types of Transfer Stickers: Heat Transfer, Cold Transfer, and Vinyl Stickers Explained
Heat Transfer Stickers:
Heat transfer stickers require heat to enhance adhesion and are perfect for fabrics, metals, and wood surfaces. They are commonly used for custom apparel, souvenirs, and car decals.
Cold Transfer Stickers:
Cold transfer stickers don’t need heat but instead rely on pressure to transfer the design. They are often used for more intricate designs and are popular for promotional materials and personalized items.
Vinyl Stickers:
Vinyl stickers are extremely durable, weather-resistant, and long-lasting, making them ideal for outdoor advertising, vehicle decals, and other applications that require high durability. They offer strong water resistance and UV protection, making them perfect for harsh environments.
How to Ensure Your Transfer Stickers Last: Tips for Longevity
Surface Cleaning:
The first step in ensuring your transfer stickers last longer is to keep the target surface smooth and clean. Use the right cleaning solution to wipe the surface and ensure it’s completely dry before applying the sticker.
Bubble-Free Application:
Use a squeegee or a credit card to help eliminate any air bubbles. Apply gentle pressure to avoid bubbles or creases that can negatively affect the appearance. Take care not to rub too aggressively during the application process.
Conclusion
Transfer stickers are a versatile and practical tool for decorating everything from home interiors and vehicles to DIY projects. By mastering the correct application techniques, you can easily create personalized designs and ensure that your stickers maintain their quality and appearance for years. Whether for personal use or business promotion, transfer stickers provide a professional, high-quality finish that elevates your creative projects.
FAQ
What is a transfer sticker, and how is it different from a regular sticker?
A transfer sticker is a type of decal that allows you to precisely transfer a design onto another surface. Unlike regular stickers, transfer stickers don’t have an adhesive backing. Instead, they use a special backing film to help transfer the design to the target surface. Transfer stickers are ideal for transferring intricate designs without leaving any extra edges, making them perfect for creating complex, detailed artwork.
What surfaces are suitable for transfer stickers?
Transfer stickers can be applied to a variety of surfaces, including:
- Smooth surfaces: Glass, metal, wood, and plastic.
- Walls: Especially flat interior walls, perfect for home decoration.
- Clothing: Heat transfer stickers are ideal for T-shirts, hats, and other fabric items.
- Vehicles and other transportation: Great for car windows and body decals.
For uneven surfaces, such as rough walls or irregularly shaped objects, you may need to choose specific types of transfer stickers or perform additional surface preparation.
How do I apply a transfer sticker?
Follow these steps to apply a transfer sticker:
- Clean the surface: Make sure the surface is free of dust, oil, or any contaminants.
- Align the design: Position the sticker on the target surface and ensure it's in the correct place.
- Press the transfer: Start from one edge and gently press the sticker onto the surface using a squeegee or credit card, ensuring no air bubbles.
- Remove the backing film: After the transfer is complete, carefully peel off the backing film, ensuring the design stays on the surface.
My transfer sticker isn’t laying flat. How do I fix it?
If your sticker isn’t applying smoothly, it’s usually due to air bubbles, wrinkles, or improper technique. You can try:
- Bubble removal: Use a pin to gently puncture air bubbles, then use a squeegee to push out the air.
- Repositioning: If the sticker is misaligned, gently peel it off and adjust its placement.
- Using a squeegee: Press the sticker evenly with a squeegee to ensure it adheres smoothly to the surface.
Can transfer stickers be reused?
Most transfer stickers are designed for one-time use, but some high-quality removable transfer stickers can be reused after being peeled off. To extend the life of your sticker, make sure the surface is clean and free of dust or grease before applying it. When removing, be gentle to avoid damaging the sticker.
Can transfer stickers go in the washing machine?
If you're using heat transfer stickers on fabric, it's usually recommended to let the sticker set for 24 hours after the initial application to ensure a strong bond. Afterward, you can wash the clothing in cold water, turning it inside out, and avoid high-heat drying. Excessive heat from washing or drying may cause fading or peeling.
For other types of transfer stickers, like those on walls or vehicles, avoid water or high-temperature environments to maintain their longevity.
How can I prevent my transfer sticker from fading or getting damaged?
To keep your transfer stickers looking good for longer, follow these tips:
- Avoid direct sunlight: Prolonged exposure to UV rays can cause the colors to fade, especially for outdoor stickers.
- Be gentle when cleaning: Avoid using harsh brushes or abrasive cleaners on the sticker surface.
- Use a protective film: For outdoor stickers, consider applying a protective laminate to increase UV and water resistance.
How do I remove a transfer sticker?
To remove a transfer sticker from smooth surfaces like walls or glass, follow these steps:
- Apply heat: Use a hairdryer to gently heat the sticker, which softens the adhesive and makes it easier to remove.
- Peel from a corner: Start peeling from one corner, slowly working your way across. If it’s difficult to remove, apply more heat and try again.
- Clean adhesive residue: If any adhesive is left behind, use warm water with a mild cleaner or a specialized adhesive remover to wipe it off.
What temperature can transfer stickers withstand?
Most transfer stickers are designed to tolerate a certain temperature range. For outdoor stickers, they typically withstand temperatures from -10°C to 50°C (14°F to 122°F). For heat transfer stickers, especially those applied to clothing, avoid high heat during drying or exposure to excessive heat sources. Always check the product instructions for the specific temperature range suitable for the material.
How can I ensure my transfer stickers last longer?
To maximize the lifespan of your transfer stickers, consider the following:
- Proper surface preparation: Make sure the surface is completely clean, dry, and smooth before applying the sticker.
- Avoid touching the adhesive side: Handling the adhesive surface can transfer oils and dirt, reducing the sticker's adhesive strength.
- Avoid excessive friction: Especially in outdoor environments, excessive rubbing or scratching can cause wear on the sticker.
- Choose high-quality stickers: Opt for high-quality transfer stickers designed for outdoor or long-term use to ensure better durability.
How do I design my own transfer sticker?
To design a transfer sticker, you can use popular design software like Adobe Illustrator or CorelDRAW to create vector graphics. Make sure your design is high-resolution (preferably 300dpi) and in CMYK color mode for the best print quality. If you're not familiar with design software, you can use online design tools or hire a professional designer to help bring your ideas to life.
Are transfer stickers suitable for commercial advertising?
Yes, transfer stickers are widely used in commercial advertising and brand promotion. They provide high-quality design transfer and are perfect for shop displays, event signage, vehicle advertising, and more. Due to their durability and visual impact, transfer stickers are an ideal choice for businesses looking to promote their brand effectively.


