Skip to content
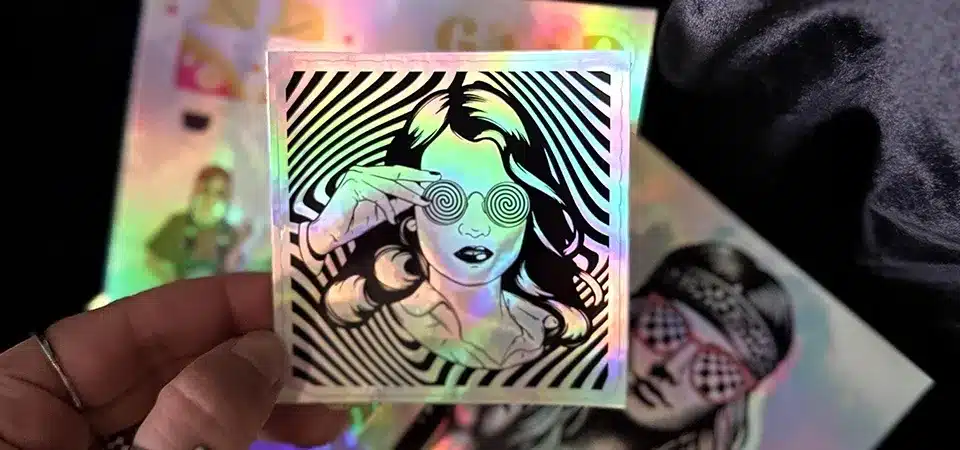
You've seen those incredible, eye-catching holographic stickers everywhere and think they're impossible to create yourself. The process seems like a complex industrial secret, leaving your sticker ideas stuck in boring, flat colors.
To make holographic stickers, you print your design directly onto a special holographic vinyl film. For durability and a professional finish, you then apply a clear laminate over the print and cut it to your desired shape, either by hand or with a machine.
As someone who prints thousands of stickers a day, I can tell you holographic stickers aren't magic—they're just a perfect combination of the right material and a smart design. The "hologram" effect comes from the vinyl itself, which acts like a stunning, shimmery canvas for your art. I remember the first time I printed a holographic batch for a client's synth-wave band. Seeing their simple black logo transform into a shifting rainbow of color was a game-changer. It elevated their brand instantly. I'll walk you through the exact same process so you can get that "wow" effect, too.
What are holographic stickers?
You hear the term "holographic" but aren't totally sure what it means. It just looks shiny, but you feel like you're missing the secret behind what makes them so special.
Holographic stickers are made from a material with a metallic, micro-embossed surface that diffracts light. This creates a shimmering, rainbow-like effect that changes as you view it from different angles, similar to the back of a CD.

Think of the holographic material as the real star of the show. Your printer lays down the ink, but it's the special vinyl underneath that does all the heavy lifting to create the visual effect. The surface of the vinyl has tiny grooves, almost invisible to the eye, that act like miniature prisms. When light hits these grooves, it splits into a full spectrum of colors, giving you that 'rainbow' shine. It’s not a 3D hologram like in the movies, but a brilliant optical illusion. There are even different patterns available—from the classic rainbow sheen to others that look like shattered crystals, sequins, or tiny dots. You're not just choosing a color; you're choosing an effect.
Why use holographic stickers?
Your standard stickers look fine, but they don't exactly jump out of a lineup. You're spending money on promotions that just blend in, failing to capture the attention your brand deserves.
Holographic stickers are a powerful marketing tool because their light-shifting effect is impossible to ignore. They make your brand look more premium, increase the perceived value of your products, and are highly memorable.

In a world full of visual noise, "eye-catching" is a superpower. Holographic stickers are the superheroes of the sticker world. I had a client who sold handmade soaps with simple paper labels. They were struggling to stand out at craft markets. We switched them to a holographic label with the exact same logo. They told me that customers started picking up their products just to look at the label, which gave them the opening they needed to make a sale. That's the power of this material. It doesn't just sit there; it performs.
Here's why they work so well:
- They Grab Attention: The human eye is naturally drawn to light and movement. The shifting colors of a holographic sticker make it stand out on a crowded shelf or a laptop full of other decals.
- They Feel Premium: The effect looks expensive and high-tech, which elevates the perceived value of whatever it's attached to. It makes a product feel more special and gift-worthy.
- They Are Unique: Because the look of the sticker changes with the light, it provides a dynamic experience that a static color just can't match.
How to Make Holographic Stickers?
You're convinced you want to make them, but the actual process seems technical and out of reach. You don't have a giant factory, so you're not sure where to even begin.
The process is straightforward: gather your tools, create a design that complements the holo effect, print it on holographic vinyl, and then cut it out. Each step is simple enough to do at home.

Making professional-quality holographic stickers is all about a good process. Think of it like baking a cake—if you have the right ingredients and follow the recipe, you'll get a great result. Let's walk through the recipe step-by-step.
Step 1: Prepare the tools
First, you need your ingredients. The most important one is holographic sticker paper or vinyl. Make sure you get the right kind for your printer (inkjet and laser versions are different). You'll also need a printer, scissors or a cutting machine (like a Cricut), and optionally, a clear laminate sheet for extra durability. As a pro, I can't stress the laminate enough—it’s what makes stickers scratch-proof and truly waterproof. Our shop uses large-format Eco-Solvent and UV printers for the best results, but you can get started with a good home inkjet printer as long as you buy the specific "Inkjet Printable Holographic Vinyl."
Step 2: Design the Holographic Sticker
Here’s an insider tip: the best holographic sticker designs use the effect strategically. If you cover the entire sticker with solid, light-colored ink, you'll hide the rainbow effect underneath. Instead, try designing with bold black areas or large areas of negative space (where no ink is printed). The black ink will look rich and deep, while the un-printed parts of the design will explode with holographic color. This contrast is what creates a truly stunning sticker.
Step 3: Print the Holographic Sticker
Set your printer to its highest quality setting, often called "Best" or "Photo Quality." In your printer's settings, tell it you're printing on "Glossy Photo Paper" or a similar heavy-duty stock. This tells the printer to use more ink and take its time, resulting in a much crisper image. Print a single test design first to make sure your colors look right before you print a whole sheet. After printing and letting the ink dry completely, apply the clear laminate sheet over the top if you're using one.
Step 4: Apply your own holographic sticker!
Now for the fun part. Carefully cut out your designs. If you're using scissors, take your time and rotate the paper, not your hand, to get smooth curves. If you're using a cutting machine, make sure it's calibrated to cut perfectly around your design. Once cut, your sticker is ready! Peel and stick it on your laptop, water bottle, or packaging and watch it catch the light.
Tips for Making Holographic Stickers
You've made your first batch, but they don't look quite as professional as the ones you see online. You feel like you're missing a few key tricks of the trade.
To level up your stickers, use high-contrast designs with lots of black or empty space. Always use a clear laminate for waterproofing and UV protection, and ensure your cutting is precise for clean, professional edges.

Getting a good result is one thing; getting a great result is another. Over the years, I've learned a few non-negotiable rules for making holographic stickers that truly pop. These are the details that separate amateur attempts from professional products.
- Let the Holograph Breathe. I can't say this enough. Don't hide the effect you're paying for! The most common mistake I see is a design that is too busy or has too much color coverage. The holographic effect is strongest in areas with no ink. Use it as a design element itself.
- Lamination Is Not Optional. If you want your sticker to last more than a week, you need to laminate it. A clear laminate overlay does three things: it makes the sticker completely waterproof, it protects the printed ink from scratching off, and it adds UV protection to stop the colors from fading in the sunlight.
- Calibrate Your Cutter. If you're using a Cricut or Silhouette, a perfect cut is essential. A wobbly or off-center border screams "homemade." Take the five minutes to run the calibration process in your machine's software. It will ensure your cut line is exactly where it's supposed to be, giving you that perfect, professional-looking white border.
- Match the Material to the Printer. Do not try to use laser-printable holographic paper in an inkjet printer, or vice versa. They are formulated differently. Inkjet paper is coated to absorb liquid ink, while laser paper is designed to have toner fused to it with heat. Using the wrong one will result in a smudged, unusable mess.
Conclusion
Making holographic stickers is a blend of science and art. By choosing the right materials, creating a smart design, and using lamination, you can create stunning, professional-quality stickers that demand attention.
FAQs
What material is used for making hologram stickers?
It's typically a BOPP (Biaxially-Oriented Polypropylene) or vinyl film with a metalized layer that has been micro-embossed with a pattern to diffract light. You print your design on top of this film.
How is holographic vinyl made?
A master hologram is created with lasers on a photosensitive plate. This pattern is then transferred to metal molds or rollers, which are used to emboss the pattern at a microscopic level onto the metalized surface of the vinyl.
Can you print on holographic sticker paper?
Yes, absolutely! That's what it's designed for. You print your artwork directly onto the holographic surface. The ink sits on top of the effect, allowing you to choose which parts of the design show the rainbow shine.
Can I print holographic stickers on an Inkjet printer?
You can, but you must buy sticker paper specifically labeled "for inkjet printers." Standard holographic vinyl won't absorb the water-based ink correctly, and it will smudge. For best results, you also need to seal or laminate it.
Can I make holographic stickers at home?
Yes! With the right inkjet-printable holographic paper, a standard home printer, and a pair of scissors or a craft cutting machine, you can definitely make them at home for personal projects or small batches.
Are holographic stickers waterproof?
This depends on the material, ink, and lamination. The vinyl base is waterproof, but inkjet ink will run when wet. To make a truly waterproof and durable sticker, you MUST use a clear laminate over the print. Professionally printed stickers (using Eco-Solvent, UV, or Laser ink) are inherently much more water-resistant.
What printer do I need for holographic labels?
For professional, durable results, printers that use Eco-Solvent, UV, or Laser/Toner systems are best. For DIY at home, a good-quality inkjet printer can work as long as you use the correct paper and a laminate.
How long do holographic stickers last?
A professionally printed and laminated holographic sticker can last 3-5 years outdoors. A homemade inkjet sticker, even with lamination, will have a shorter outdoor lifespan but can last for years indoors.
Can holographic stickers be used for security?
Yes, this is a very common use. Custom, complex holographic patterns are extremely difficult to counterfeit, which is why you see them on everything from event tickets and ID cards to software packaging and pharmaceuticals.
Can I cut holographic stickers into custom shapes?
Definitely! That's what die-cutting is for. Using a craft machine like a Cricut or a professional laser cutter like we have in our shop, you can cut holographic stickers into any custom shape you can imagine.