You want to create fun, custom stickers but think it requires expensive equipment or special paper. This stops you from bringing your cool ideas to life.
To make a sticker with tape, you draw or print a design on paper, cut it out, and then "laminate" it between two layers of clear packing tape on a non-stick backing like wax paper.
As someone who runs a sticker printing business, I absolutely love this DIY method. I often suggest it to clients who are just starting out. Making your own tape stickers is a fun, zero-risk way to experiment with your designs. You can test colors, see how a shape looks on your product, and even get feedback from friends or customers before you commit to a professional print run. It’s a hands-on process that teaches you a lot about what works. Let's walk through how you can do it at home.
Is making tape stickers for everyone?
You think you need to be an artist or a serious crafter to make your own stickers. This might make you feel like the project isn't for you, and you'll miss out on the fun.
Yes, absolutely anyone can make tape stickers. The process is perfect for kids, hobbyists, journal keepers, and even small business owners who want to test new design ideas without spending any money.

I truly believe this project is for everyone, regardless of skill level. When I consult with new brands, some owners are worried about ordering 500 stickers of a design they haven't seen in person yet. This is where the tape sticker method shines as a business tool. I tell them, "Go home and make a tape version of your top three designs. Stick them on your jars or boxes and live with them for a few days." This simple step helps them see which one feels right.
For hobbyists and parents, it’s just pure, simple fun. It’s an easy, low-mess craft for a rainy day. You don’t need any special skills. If you can use scissors and tape, you can make a sticker. It’s a wonderful way to create personalized decorations for school notebooks, planners, or handmade gifts. It’s all about creativity, not technical perfection.
What will you need to make DIY stickers?
You want to start making stickers right now, but you think you need a long list of supplies. The thought of having to go to a craft store is a hassle.
You probably already have everything you need. The core items are just paper, pens or a printer, clear packing tape, scissors, and some wax paper or baking parchment from your kitchen.

One of the best things about this project is its simplicity. You don't need to hunt for special materials. I've broken down what you'll need into a few simple categories.
Base materials
These are the absolute must-haves for the sticker structure itself.
| Material | Purpose | My Tip |
|---|---|---|
| Paper | The canvas for your sticker design. | Regular printer paper works perfectly. Cardstock is too thick. |
| Clear Packing Tape | The "laminate" that protects the design and makes it a sticker. | Use a good quality, wide packing tape. It gives a glossier, more durable finish. |
| Backing Paper | The non-stick surface to build the sticker on. | Wax paper or baking parchment are both excellent choices. |
Decorating tools
This is how you bring your design to life on the paper. You can draw by hand or print from a computer. For drawing, basic markers, pens, or colored pencils are all you need. If you're using markers, be aware they might bleed a little on standard paper.
Optional extras
These items aren't necessary, but they can make the process a bit easier or add some extra flair. A craft knife can help with cutting intricate designs. You could also experiment with adding a fine layer of glitter on top of your design before sealing it with the final layer of tape.
How do you create your own sticker with tape in 7 easy steps?
The process seems like it might have a lot of tricky parts. You're worried you'll miss a step and end up with a sticky, wrinkled mess instead of a cool sticker.
Just follow this simple process: design, cut, prepare the backing, lay down tape, place the design, seal with more tape, and cut out your final sticker. It’s a straightforward method anyone can master quickly.

I'm going to walk you through the exact process, step-by-step. It's very forgiving, so don't worry about getting it perfect on your first try.
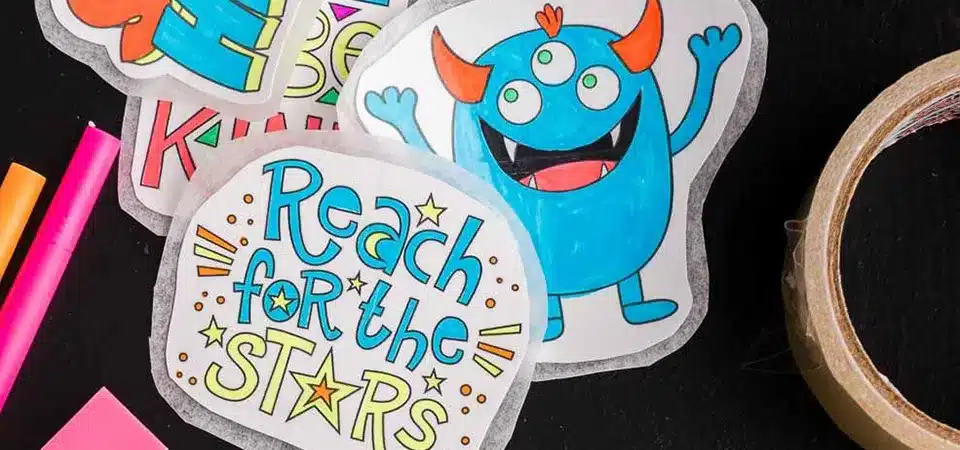
1. Draw or print your sticker design
Create your design on a piece of paper. You can draw it with markers and pens or print an image from your computer.
2. Cut out the design
Use scissors to cut out your design. I suggest leaving a small white border of about 1-2 millimeters around the edge. This helps the design stand out more.
3. Prepare the backing
Lay a sheet of wax paper or baking parchment on your work surface. This will be your non-stick canvas.
4. Add the first tape layer
Place a strip of clear packing tape, sticky-side down, onto the wax paper. Make sure it's larger than your paper design. Smooth it out to remove any bubbles.
5. Place the design on the tape
Take your paper cut-out and place it face-down onto the sticky side of the tape you just laid down.
6. Seal with the second tape layer
Take another piece of packing tape and carefully place it on top of your design, sticky-side down. This second layer seals the paper design inside. Go slowly to prevent wrinkles and bubbles.
7. Cut out the final sticker
Peel your "laminated" design off the wax paper. It will be sticky on the back. Use scissors to cut it out, leaving a 3-5 millimeter clear border of tape around the paper design. This border is what will stick to your surface and it also seals the paper from moisture. And that's it! You have a homemade sticker.
What are some tips and ideas for making tape stickers?
You've made your first sticker, which is great. But now you want to make them look even better and you're looking for some creative ways to use them.
For better stickers, use good quality tape and a credit card to smooth out bubbles. For ideas, try making custom labels for your planner, prototypes for your business, or fun decorations for kids' parties.

After you've mastered the basic technique, there are a few little tricks and a world of possibilities that open up. As a pro, here are some of the things I've learned that can apply even to this simple DIY method.
Few tips when making stickers with tape
- Quality Matters: The clearer and stickier your packing tape, the better your final sticker will look. Cheap tape can be cloudy or have weak adhesive.
- The Squeegee Method: Use the edge of a credit card or a ruler to smooth down the tape layers. This is the best way to force out air bubbles for a professional-looking finish.
- Leave a Clear Border: I mentioned this in the steps, but it's the most important tip. The tape-on-tape seal around your paper design is what makes the sticker durable and water-resistant. Don't skip it!
- Overlap Tape for Big Stickers: If your design is wider than your tape, you can lay down multiple strips. Just overlap the edges by about half a centimeter to ensure a good seal.
Homemade sticker ideas
- Planner and Journal Stickers: Create custom icons, labels, and decorations for your personal organizer.
- Branding Prototypes: Test out your new business logo on your packaging or products to see how it looks in the real world.
- Custom Gift Tags: Make personalized stickers with names or a special message to add a unique touch to presents.
- Kids' Crafts: Let children draw their own characters and turn them into stickers for notebooks, lockers, or party favors.
Conclusion
Making stickers with tape is a fast, fun, and affordable way to get creative. It’s the perfect method for testing your design ideas before investing in a professional print run.


