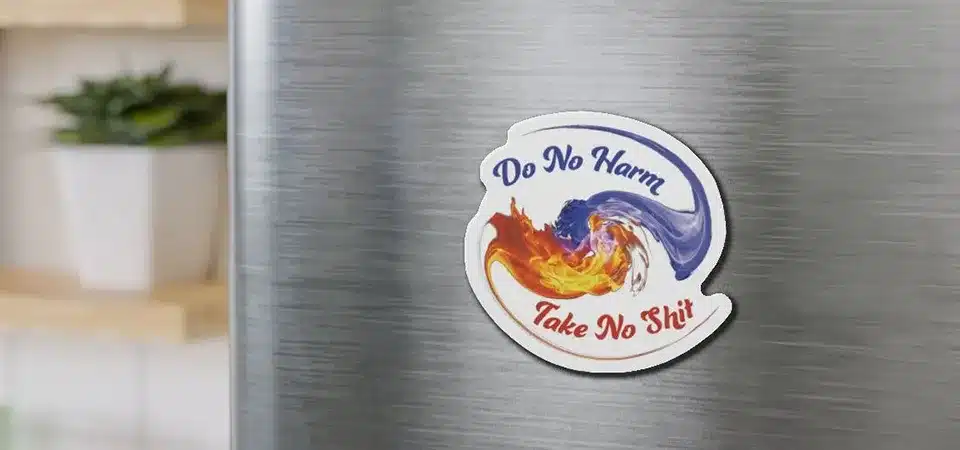
Want unique custom magnets without the high cost of a big order? Boring fridge decor won't cut it. You can actually make your own professional-looking die cut magnets at home.
To make die cut magnets, design your artwork, print it on weatherproof sticker paper, and apply a laminate. Then, stick your laminated design onto a flexible magnetic sheet and carefully cut it out into your desired shape using scissors or a craft knife.
As someone who prints thousands of custom stickers and labels, I get asked about magnets all the time. They're like stickers that can move! Making them yourself is a really fun project, and it gives you total creative freedom. But before you jump in, it's worth understanding why magnets are so effective and whether the DIY route is the right path for you. Let's break down the process.
Why should you use custom magnets?
Handouts like flyers and business cards often get thrown away immediately. Your marketing budget gets wasted. Magnets stick around on fridges, keeping your brand visible daily.
Custom magnets are powerful marketing tools because they are useful and long-lasting. Unlike paper ads, they stick to refrigerators or file cabinets, giving your brand consistent, daily visibility in high-traffic areas.

Magnets are more than just fridge decorations; they are tiny, persistent billboards. From my experience in the branding world, their power lies in their 'stickiness'—both literally and in a customer's mind. A business card might get looked at once, but a refrigerator magnet gets seen multiple times a day. Think about the 'cost per impression.' A flyer costs money to print and gives you one chance. A magnet costs a little more upfront but provides hundreds, if not thousands, of impressions over its lifespan. This makes it an incredibly cost-effective tool. I once worked with a local pizza place that used flyers. I suggested they switch to magnets with their menu QR code and phone number. The magnets were useful, so they stayed on the fridge, and their re-order rate went up. They work brilliantly for service businesses, but they're also great for personal use, like 'Save the Date' magnets for a wedding or unique fridge art.
Should you make your own custom magnets or order them?
Want just a few custom magnets but printers have high minimums? The cost seems too high for a personal project. Making them yourself is the perfect solution for small batches.
Making your own is great for small batches, personal gifts, or testing designs. For larger quantities, professional quality, or complex shapes, ordering from a supplier is better and more cost-effective.

I love crafting, so I totally get the appeal of DIY. But as a business owner, I have to be realistic with my clients. A local artist once wanted 500 magnets for a convention. I explained that cutting 500 magnets by hand, all perfectly, is almost impossible. The time she would spend would cost more than my professional service. The choice really depends on what you value most: the process or the outcome. Here's a simple breakdown I use to help my clients decide.
| Aspect | DIY Magnets | Professionally Ordered Magnets |
|---|---|---|
| Best For | Small batches (1-50), personal gifts, prototypes. | Bulk orders (100+), businesses, retail products. |
| Cut Quality | Dependent on your skill; can be uneven. | Perfectly clean and consistent every time. |
| Durability | Good, if you use quality laminate. | Excellent, with options for UV coating and car-grade material. |
| Cost | Higher per-unit cost for materials. | Very low per-unit cost at high volumes. |
| Time Investment | Significant. You do all the printing and cutting. | Minimal. You just upload your design. |
| Creative Control | Total control, but limited by your tools. | Total control, with any shape or size possible. |
How do you make die cut magnets step-by-step?
Want to make magnets but the process seems complicated? You're afraid you will waste money on the wrong supplies. I'll show you an easy step-by-step guide.
First, create your design and print it onto waterproof vinyl sticker paper. Apply a clear laminate for protection, then carefully stick the printed sheet onto a flexible magnetic roll. Finally, cut out your shape.

Making your own magnets is a straightforward process when you break it down. As someone who handles these materials daily, I can tell you that quality supplies are the secret to a great result. Let’s walk through it.
Step 1: Design your custom artwork
Your magnet is only as good as your design. You can use simple tools like Canva, which is free and very user-friendly. If you're more advanced, Adobe Illustrator is the professional standard. The most important thing is to create your artwork at a high resolution—I always recommend 300 DPI (dots per inch). This ensures your final print isn't blurry. When you design, think about cutting. Simple shapes with smooth curves are much easier to cut by hand than designs with lots of sharp points.
Step 2: Choose the right material
This is where quality really matters. You'll need three things: printable sticker paper, a laminate sheet, and a magnetic sheet. For the sticker paper, I highly recommend using waterproof inkjet vinyl instead of regular paper. For the laminate, a self-adhesive clear sheet will protect your print from scratches and UV fading. Finally, the magnetic sheet. They come in different thicknesses. A 20-30 mil thickness is good for a standard fridge magnet that can hold up a piece of paper.
Step 3: Print your design
Now, print your design onto the vinyl sheet using an inkjet printer. Make sure to choose the 'high quality' or 'photo' setting in your print options. Let the ink dry completely for at least 30 minutes to avoid smudging.
Step 4: Laminate your print
This step is crucial for durability and makes your project look professional. Carefully peel back one edge of the laminate sheet and align it with your printed sheet. Use a credit card or a small squeegee to slowly press the laminate down, pushing out any air bubbles as you go.
Step 5: Attach your printed design to the magnetic sheet
Your printed and laminated design is now basically a big, durable sticker. Peel off the backing and carefully apply it to your magnetic sheet. Again, start from one edge and use a squeegee to ensure there are no bubbles.
Step 6: Cut your magnet into shape
This takes patience. For simple shapes, a pair of sharp, sturdy scissors works well. For more detailed cuts, a sharp craft knife and a self-healing cutting mat are your best friends. Go slowly and follow your lines carefully. This manual cutting is what defines a DIY magnet—it might not be perfect, but it's made by you.
Conclusion
Making DIY magnets is a fun project for small batches. For professional quality, durability, and volume, ordering from a specialist is the best path for your brand's growth.


