Skip to content
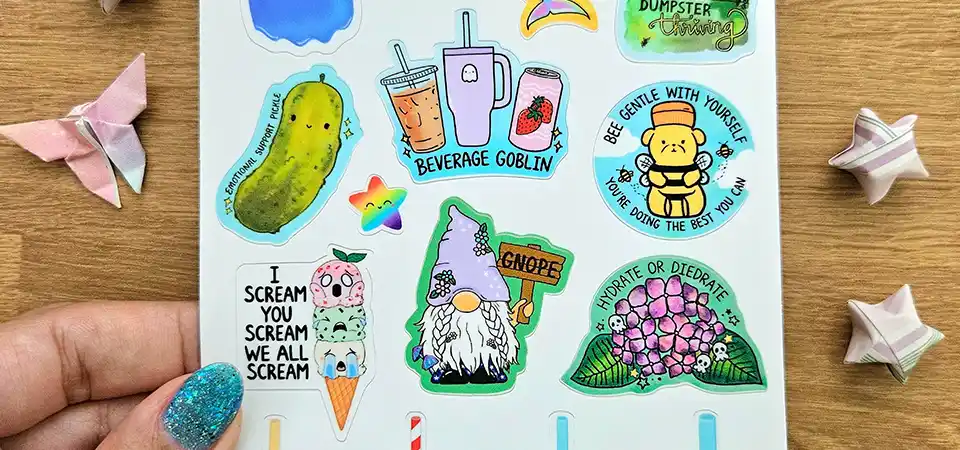
You have a fantastic design ready, but you are confused about how to translate that single image into a full page of printed stickers. You worry that ordering a "sheet" might mean getting just one giant sticker instead of the multiple labels you actually need.
Yes, you can absolutely get your design on a sheet. In fact, printing on sheets is the industry standard for efficiency. We can take your single design and repeat it across the page, or we can arrange multiple different designs onto one layout, "kiss-cutting" each one so they peel off individually.
Many of my clients get stuck here. They think they need to set up the whole page themselves, or they end up ordering 500 individual stickers when 50 sheets would have been cheaper and easier to use. The reality is that the "sheet" is just the vessel; what goes on it is entirely up to you. Whether you need product labels for jars or a fun merchandise set for your shop, understanding how we put your design on a sheet will save you time and money.
Do I enter my sheet size or the size of the individual label?
You are filling out the order form and see two different potential size fields. You panic, thinking that if you enter the wrong number, you’ll end up with microscopic stickers or a poster-sized label.
Always enter the size of the final sheet you want (e.g., A4 or 8.5"x11") as the main product size. Then, in the notes or specifications, tell us the size of your individual label. The sheet size determines how many labels we can fit.

This is the most common mistake I see in my inbox. A customer wants 50mm round stickers, so they enter "50mm x 50mm" as the product size. If they select "sheet labels," the system gets confused.
To clear this up, you need to separate the Layout Size from the Cut Size.
- The Sheet (Layout Size): This is the piece of paper you hold in your hand. Common sizes are A4, A5, or US Letter. This limits the total area we have to print on.
- The Label (Cut Size): This is the actual sticker you peel off.
When you order, you are buying the sheet. So, you tell us, "I want A4 sheets." Then, we use your artwork size to calculate the quantity. For example, on an A4 sheet (210mm x 297mm), we can fit about 15 to 20 round stickers that are 50mm wide, depending on spacing. If you only give us the sticker size, we don't know what size sheet you want them delivered on. Always start with the sheet size to get an accurate quote.
How to get a single design on your sheet
You need 1,000 labels for your new coffee bags. You are dreading the idea of manually copying and pasting your logo 1,000 times into a design file, fearing you will mess up the alignment.
You do not need to do the layout yourself for a single design. Simply send us your one high-quality logo file and tell us the size. We will use our software to automatically duplicate and arrange it on the sheet for maximum efficiency.

This process is called "Step and Repeat," and it is a standard part of our prepress service. Please do not waste hours in Photoshop trying to make a grid!
When you send us a single file, here is what happens:
- Verification: We check your file resolution (300 DPI is best) to make sure the single image is crisp.
- Calculation: We input your desired sticker size (e.g., 3 inches wide).
- Automation: Our RIP (Raster Image Processor) software calculates how many fit on your chosen sheet size. It accounts for the necessary "bleed" (extra color extending past the cut line) and the "safety gap" between stickers.
- Optimization: Sometimes, rotating the design 90 degrees allows us to fit more on the page. We do this math for you to ensure you get the most stickers for your money.
We prefer you send the single file because it reduces the file size and prevents errors. If you try to layout 50 logos yourself and one is slightly pixelated or misaligned, the whole sheet is ruined. Let our machines do the heavy lifting.
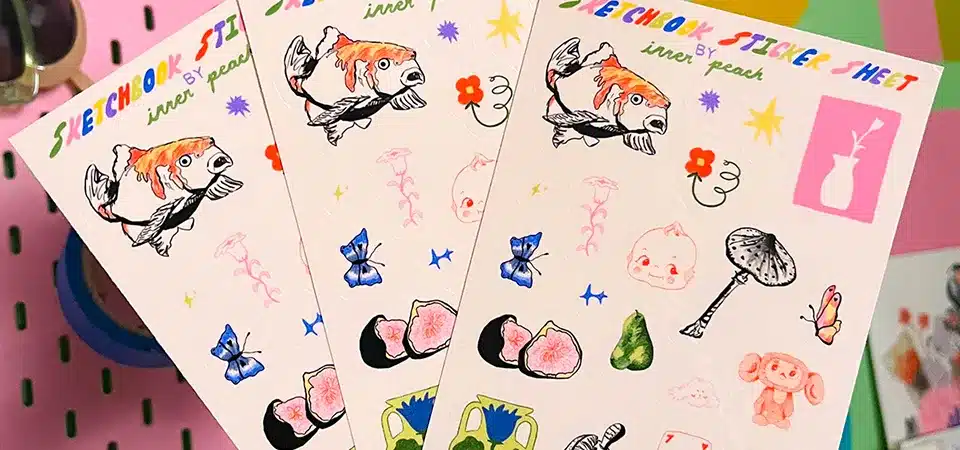
How to get multiple designs on your sheet
You are an artist launching a "Spring Collection" sticker pack. You want a flower, a bee, and a sun all on one page, but you don't know if you need to pay for three separate printing jobs.
You can absolutely have multiple different designs on one sheet. This is often called a "Sticker Set" or "Kiss Cut Sheet." You just need to arrange all your different artworks onto one canvas in your design software before sending it to us.

Mix-and-match sheets are my favorite thing to print. They offer huge value to your customers because they feel like they are getting a "kit" rather than just one item.
To make this work, the process is different from the single-design job. You do need to do some layout work here. You cannot just send us five separate files and say "put them on a sheet" (unless you pay an extra design fee). You need to create a canvas that matches your desired sheet size (like A5). Then, drag and drop your different characters onto that canvas.
Things to watch out for:
- The Cut Lines: Each design needs its own cut path.
- Spacing: Don't put the bee too close to the flower! We need space for the blade to travel.
- Quantity Balance: You can control the ratio. If you want two suns but only one bee, you just place two suns on your artboard. You have full control over the mix.
Arrange all your designs on one sheet
You are trying to squeeze as many stickers as possible onto your A4 layout to save money. You pack them in tight, but then the final print comes back with cuts that drift into the designs.
When arranging your designs, you must leave specific "safety gaps" or margins. You need at least 3-4mm of space between each sticker and a 3-4mm safe zone around the outer edge of the sheet to ensure clean cutting.

It is tempting to play Tetris and push every sticker until they touch to get "more value." But in printing, this is a disaster waiting to happen.
Our cutting machines are incredibly precise, but paper shifts slightly as it moves through the rollers. This shift might only be 0.5mm, but if your stickers are touching, that shift means the blade cuts into the next sticker.
Here is a safe layout checklist for you to follow:
| Zone | Measurement | Why it matters |
|---|---|---|
| Outer Margin | 4mm - 5mm | The printer needs to grip the edge of the paper. We cannot print or cut right to the very edge of the sheet. |
| Gap Between Stickers | 3mm (minimum) | This prevents the sticker backing from tearing when you peel one off. It keeps the sheet stable. |
| Bleed Area | 2mm | Your artwork should extend 2mm past where you want the cut to be. This ensures you don't get ugly white slivers if the cut is slightly off. |
If you are using Adobe Illustrator, use the "Distribute Spacing" tool to make sure your gaps are even. If you are using Canva, use the grid guides. A neat, well-spaced sheet looks much more professional than a crowded, chaotic one.
Send your artwork
You export your file and email it, but we reply asking for a different format. You feel lost in technical jargon about vectors, bleeds, and CMYK.
For sticker sheets, the best format is a PDF or AI file with layers. Ideally, we need one layer for your artwork and a separate layer lying on top that shows the "CutContext" or cut lines so we know exactly where to cut.

Getting the file right is the final hurdle. Since we are printing a sheet, the file size can get heavy.
If you are sending a Solid Sheet (Single Design Repeat):
- Send a high-res PNG (transparent background) or Vector AI/PDF of the single image.
- We will handle the layout.
If you are sending a Mixed Sheet (Multiple Designs):
- Send a print-ready PDF sized to the sheet (e.g., A4).
- Resolution: Must be 300 DPI. Lower than this, and your stickers will look fuzzy.
- Colors: CMYK is best for printing. RGB (what you see on screens) often looks duller when printed.
- Cut Lines: This is the big one. If you can, make a "stroke" line in a bright color (like magenta) around your designs on a separate layer. This tells our laser where to aim.
If you don't know how to add cut lines, don't panic. Just send us the high-quality images with transparent backgrounds. Our design team can create the cut paths for you, though it might add a little time to your order.
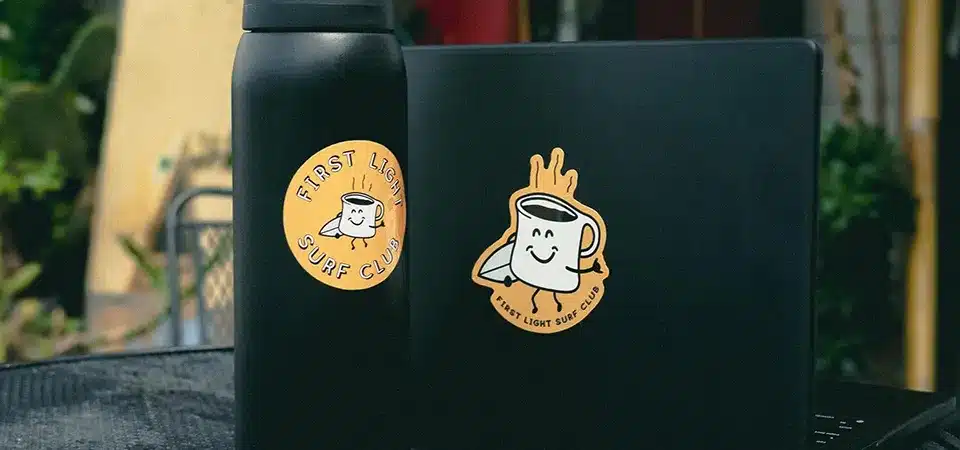
When to choose labels on sheets over custom stickers
You are staring at the price list and see "Die Cut Singles" and "Sticker Sheets." Sheets look cheaper per sticker, but you aren't sure if they are the right vibe for your brand.
Choose sticker sheets when you need high speed, lower cost, or retail sets. Choose custom die-cut singles when you need a premium handout for events or to include as a free gift in packages.

The choice between sheets and singles isn't just about price; it's about application.
Go for Sheets when:
- You are labeling products: If you have to stick labels on 500 jars of jam, you do not want individual stickers. Peeling from a sheet is 3x faster.
- You are selling sticker kits: Planners, journals, and kids' activities utilize sheets because they keep related items together.
- Storage is an issue: Sheets stack flat and neat. 1,000 singles in a bag can get bent or messy.
- Budget is tight: We can fit more onto a sheet with less waste, so the cost per sticker is generally lower.
Go for Singles when:
- Events & Networking: You can't hand someone a whole sheet. You want to hand them one cool logo sticker.
- Unboxing Experience: Throwing a single, high-quality die-cut sticker into a customer's order feels like a special gift.
- Resale: If you want to sell a large, intricate vinyl sticker for $3 or $4, it needs to be an individual unit, not part of a sheet.
Think about the "End Use." If the sticker is staying with you (for operations), get sheets. If the sticker is going to the customer (for promotion), consider singles.
Conclusion
Yes, you can get your design on a sheet, whether it's one repeating logo or a mix of creative characters. Just remember to focus on the sheet size, leave proper spacing, and choose the format that best fits your business workflow.