Dome (3D) Labels
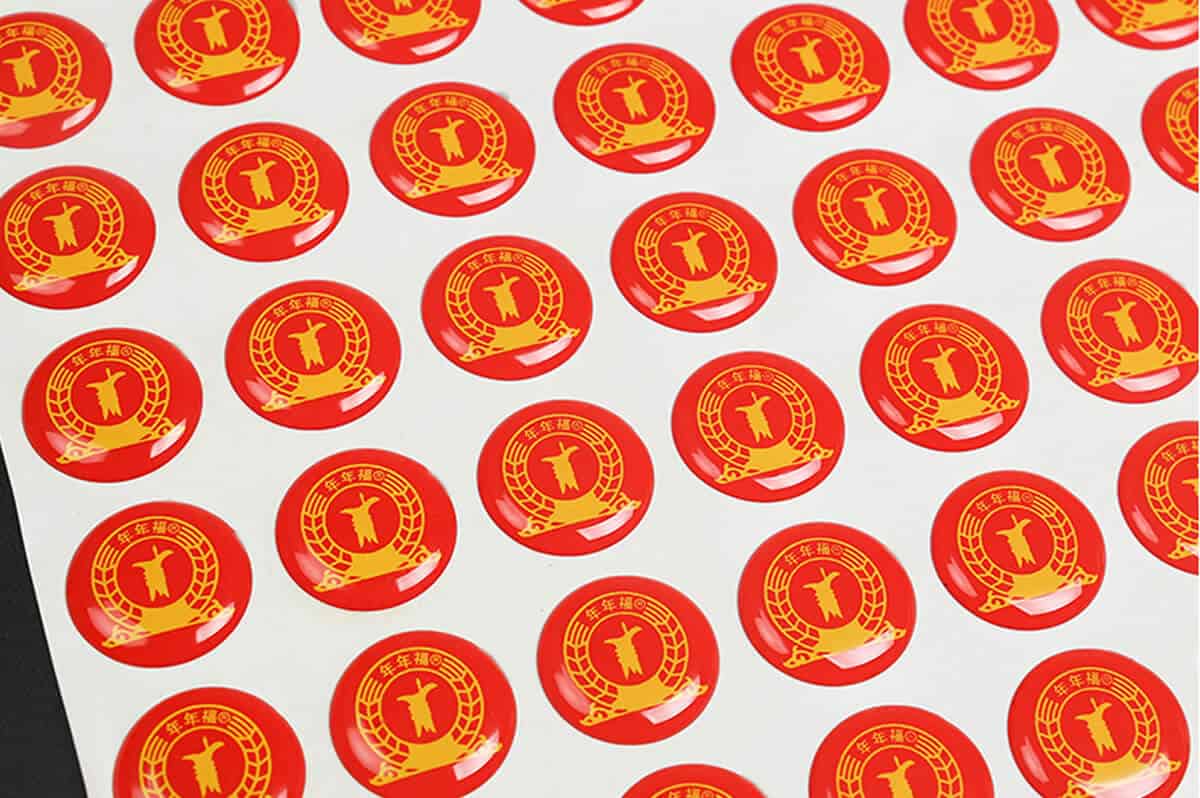
Dome labels are also known as 3D labels, dome decals, doming labels, domed adhesive labels, epoxy domed labels, as they have a dynamic three-dimensional or bubble-like appearance that is sure to make a style statement. By a crystal clear polyurethane doming process, self-adhesive labels can be transformed into eye-catching, tough, highly tactile 3D images.
Technology equipment and business process for the production of high-tech labels and polyurethane coating of image. An innovative doming system allows applying modern transparent polyurethane coatings on various items on almost any material.
The main effect of the coating is based on the unique features of polyurethane. It is strong durable and temperature resistant our resin formulation allows implementing any designing ideas and industrial requests. You can apply these materials in the advertising industry, as well as to use this technology and automotive and electronic spheres of business. Quite popular on types of machinery, car windows, or special products, they have a wonderful tactile quality that sets them apart from other products. Manufactured to almost any size or shape, our domed labels and emblems are either screen or digitally printed.

Dome (3D) Labels Features:
Dome Letters, Numbers, Custom Shapes
Scratch-resistant, self-healing property
Range of metallic vinyl options
Strong adhesion
Water-resistant
UV and chemical resistance.
Dome labels can withstand temperatures from -50°F to 250°F.
Four Color Process, Spot PMS Colors
Standard & Custom Shapes
Paper, Polyester, Polypropylene,
Compatible Surface Types include Metal, Glass and Plastic
Self-healing domes keep your logo looking great.
Great added visual appeal at a very affordable price.

Domed Labels Process
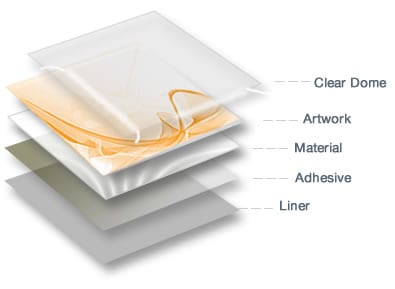
Dome labels are colorfully printed, adhesive-backed vinyl or polyester stickers that have been profile cut, then "domed over" with a super clear polyurethane resin, giving them dimension and a Jewel-like appearance.
Dome: The top layer or dome is a liquid polyurethane poured over the label and cured into a crystal clear lens. The liquid flows to the edge of the part creating the domed effect. Tight corners and radiuses should be avoided.
Artwork: Artwork is printed on the substrate using digital printing, lithography, and screen printing. Options include transparent, opaque, and metallic colors.
Material: Metal and plastic substrates are available. Aluminum is the preferred metal substrate because of the range of decorative processes available. Standard plastic substrates include polycarbonate, polyester, and vinyl.
Adhesive: Our standard is a 2 or 4 mil acrylic permanent adhesive providing adhesion to a wide range of surfaces including metals and most plastics.
Liner: Clear poly liners protect the adhesive until final application. The finished parts ship on flat sheets, as individual parts, or on rolls.
How to Make Dome Labels?
Here are a 6-step resin doming application list to help you avoid some of the common mistakes made along the way so that you can achieve perfectly applied resin domes:
- Create a flat and level work surface
After printing and cutting your images or labels onto the print media, lay the sheet flat on an allowed work tray (you can use a low-tack adhesive to keep it in place if you wish). It must be flat for the resin to sit perfectly.
2. Get your environment right
It’s so important to create the optimum set-up for doming. Ideally, the temperature in the room should be 25°C (77°F). with less than 35% humidity (use a dehumidifier if necessary). It should also be free of dust and fiber particles, as this could affect the clarity, smoothness, and finish of the resin.
3. Load the resin into the applicator
Load your resin into the applicator, before removing the cap, with a 90-degree twist, and then add a static mixer using the same twisting motion. Before use, discard the first 5ml of material by purging the cartridge to begin the chemical reaction and prevent air bubbles.
4. Apply the resin – slowly – and wait
Patience is key in the application of the resin. Take it slow and apply less than you think you need (about two-thirds of the printed image size) – and then wait for the resin to flow to the edge of the label.

5. Wait for 3 minutes before repairs
Before you dive in to remove air bubbles or dust, wait for three minutes. If, after that time, you see trapped air bubbles, give the surface a flash of heat with a flame torch very quickly. Don’t expose the dome to excessive heat as this will cause it to fail.
6. Ready to cure
If you are air drying or curing your resin naturally, without an oven, cover the sheet with the next work surface and leave it for 4 hours, by which time the domes should be dry. This will be much faster in an oven.
If you’ve followed these steps and shown patience along the way, and maybe with a little practice, you’ll discover how easy it is to create perfect resin domes and gel labels yourself.

StickerPrintingChina as a Supplier of dome labels, we have a professional printing dome label service to print your project. If I can help you, please do not hesitate to contact us.


