Skip to content
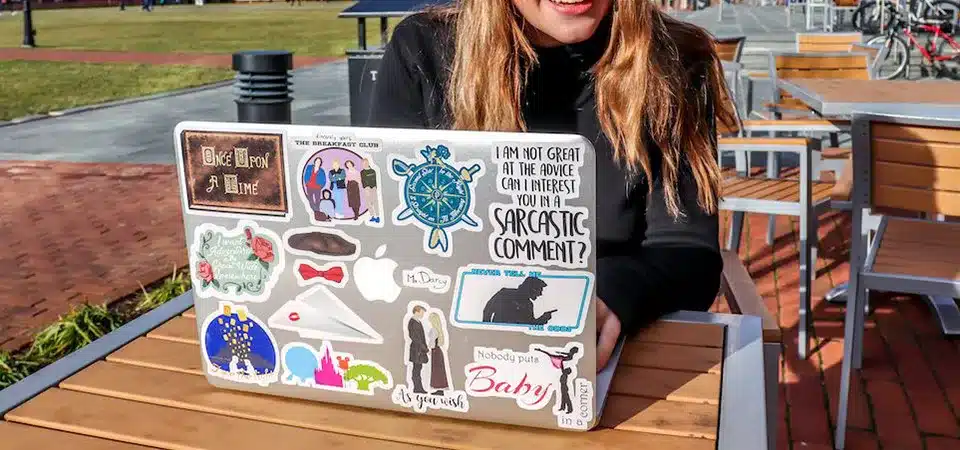
You have a fantastic collection of stickers, but they're hidden away in a drawer. It's a shame to keep these little pieces of art from being seen and enjoyed.
Display stickers on personal items like laptops, water bottles, and journals to showcase your personality. For larger collections, create wall art on canvas, use sticker albums, or decorate phone cases and keepsake boxes. Always apply to clean, smooth surfaces for the best results.
In my sticker business, I see how a simple sticker can be a powerful form of self-expression. They're not just decorations; they're tiny billboards for your personality, your travels, and the things you love. But the question I get most often is, "What do I do with them all?" The key is to think beyond the bumper of a car. Let's explore 15 creative ways to get those stickers out of the drawer and into the world.
Option 1: Tech – laptops, tablets, and phone cases
Your laptop, tablet, and phone are generic slabs of metal and glass. You want to make them uniquely yours, but you worry about applying stickers directly and leaving sticky residue behind.
Personalize your tech by applying high-quality vinyl stickers to laptop lids, tablet backs, and phone cases. For a residue-free and changeable option, place stickers inside a clear phone case, which protects both the sticker and the device.

Your tech goes with you everywhere, making it the perfect canvas. I remember my first work laptop; it was so sterile and corporate. Covering it with stickers from my favorite bands and coffee shops made it feel like mine. The key is placement. You can go for a full "sticker bomb" look, where stickers overlap to create a dense collage, or a more minimalist approach with one or two carefully chosen designs. For smartphones, the clear case method is a game-changer. You can arrange stickers on a piece of paper cut to size and switch it out whenever you want a new look—zero commitment required!
| Tech Surface | Best Sticker Type | Pro Tip |
|---|---|---|
| Laptop Lid | Durable Vinyl | Clean with rubbing alcohol first for a strong bond. |
| Tablet Back | Durable Vinyl | Great for showing off larger, more detailed stickers. |
| Phone Case | Any (if inside a clear case) | Create paper inserts to swap out sticker designs easily. |
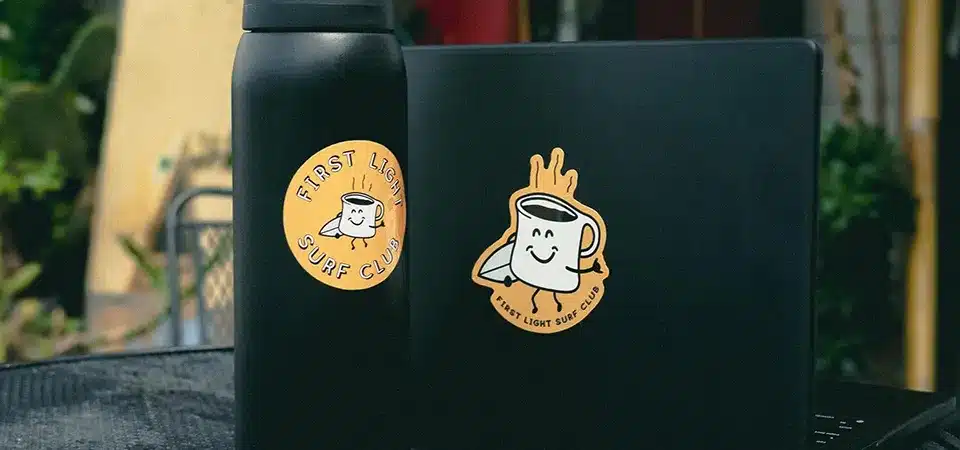
Option 2: Hydration – water bottles and tumblers
You reach for your water bottle at the gym, but so does the person next to you. With so many identical bottles out there, yours gets lost in the crowd.
Make your water bottle stand out by decorating it with waterproof vinyl stickers. This personalizes your bottle and makes it instantly identifiable. For best results, choose stickers that are listed as dishwasher-safe if you plan to machine wash it.

A water bottle has become a daily accessory, just like a watch or a wallet. It's a perfect place to tell a story. My own water bottle is a map of my travels, covered in stickers from different hiking trails and cities I've visited. When you're decorating a curved surface like this, it's crucial to use a flexible but durable material. The only real choice is waterproof vinyl. Paper stickers will disintegrate the first time you wash them. Apply the sticker by pressing down firmly from the center and smoothing your way to the edges. This helps prevent bubbles and ensures a tight seal against the curved surface, keeping water out from underneath.
Option 3: Travel – luggage, suitcases, and backpacks
You're standing at the baggage carousel, watching a parade of identical black suitcases roll by. You need a fast, foolproof way to spot your bag and avoid an awkward mix-up.
Make your luggage stand out by applying tough, laminated vinyl stickers. This helps with quick identification at baggage claim and showcases your travel history. For fabric backpacks, use specialty iron-on patches or stickers with extra-strong adhesive.

There's nothing more stressful than trying to find your bag in a post-flight rush. Stickers are the ultimate luggage hack. They turn a generic bag into a one-of-a-kind piece that you can spot from fifty feet away. This is one area where sticker durability is non-negotiable. Luggage gets thrown around, so I always recommend stickers with a protective overlaminate. This clear top layer shields the design from scratches and scuffs. For hard-shell suitcases, the application is easy. For soft or fabric luggage, a standard sticker might not hold. Look for iron-on patches or heavy-duty stickers designed for textured surfaces for the best results.
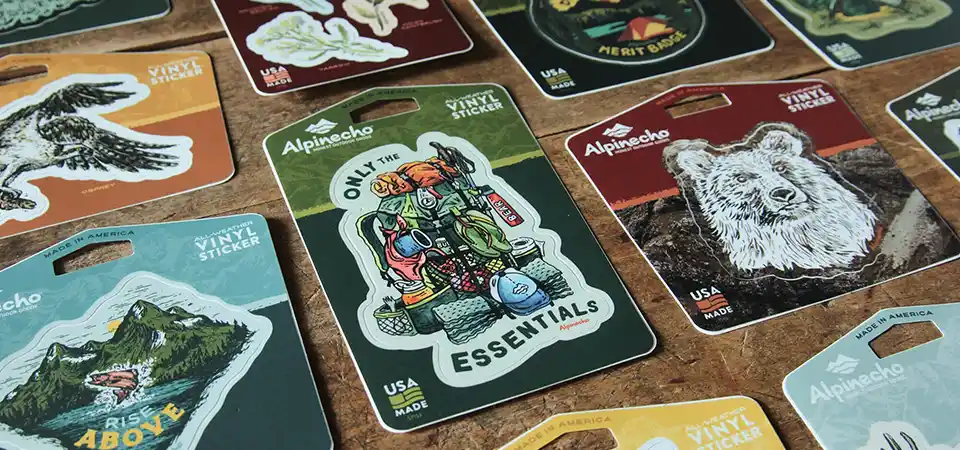
Option4: Outdoor gear & coolers
Your cooler looks like every other one at the campsite or tailgate. Your outdoor gear is functional, but it all looks the same. You want your equipment to reflect your adventurous spirit.
Customize coolers and outdoor gear with rugged, waterproof, and UV-resistant vinyl stickers. This personalizes items like coolers, kayaks, and helmets. Always choose laminated stickers to withstand sun, water, and scratches from heavy use.

Outdoor gear is meant to be used, and the stickers on it should be just as tough. A cooler often becomes a shared canvas for a family or group of friends, collecting stickers from every trip and adventure. This is where you need the most durable sticker you can get. I tell my clients to think of these as little shields. They need to resist constant sun exposure without fading, stand up to rain or splashes from the lake, and handle getting knocked around. A standard vinyl sticker won't cut it. You need one that is specifically rated for outdoor use, which means it has both a UV-protective laminate and an aggressive, permanent adhesive.
Option5: Musical instruments and cases
Your instrument case is a bland, black box. You want to give it some style, but you're terrified of putting a sticker on your precious instrument and damaging the finish.
Decorate your instrument case with stickers to express your style without risk. For the instrument itself, use easily removable static clings for temporary flair. If you must use a sticker, test it on a hidden area first.

A musician's instrument case often tells as much of a story as the music they play. It becomes a badge of honor, covered in stickers from towns you've played in, bands you love, and brands you support. Go wild with the case—it's the perfect surface. The instrument itself, however, is another story. The adhesive on a permanent sticker can damage a delicate wood finish or vintage lacquer over time. If you want to decorate the actual instrument for a specific show or just for fun, I highly recommend using static clings. They stick to smooth, glossy finishes using static electricity, not glue, and peel off with zero residue.
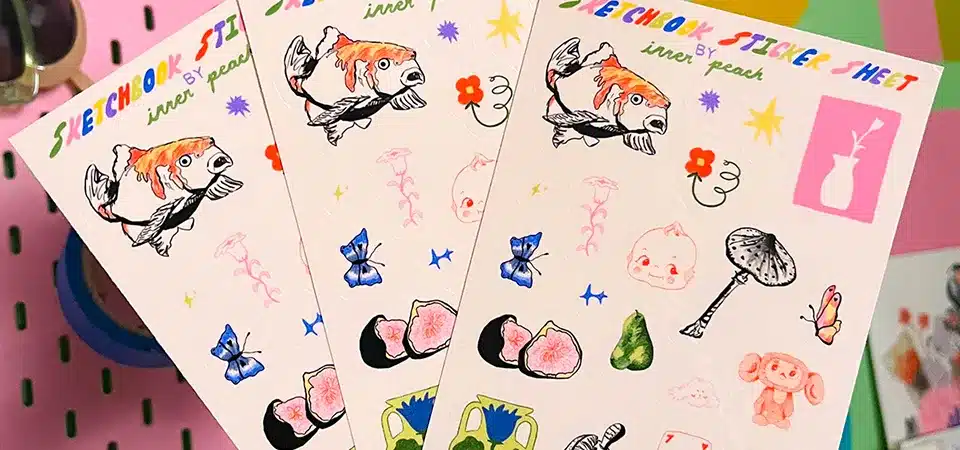
Option6: Planners and journals
Your planner is just a wall of text, feeling more like a chore than a creative outlet. You need a way to make organization more inspiring and visually appealing.
Use stickers to organize and beautify your planner or journal. Small, functional stickers can code events and tasks, while larger decorative ones add personality. This simple act transforms planning from a task into a creative habit.

This is one of the best uses for stickers that aren't heavy-duty vinyl. The world of planner stickers is huge, and they generally fall into two categories. First, you have functional stickers: little icons, dots, check boxes, and banners that help you color-code your life and draw attention to important events. Second, you have decorative stickers: quotes, illustrations, and seasonal themes that just make the pages look beautiful. Combining the two is what makes journaling so addictive for many people. It takes the pressure off having perfect handwriting or drawing skills and lets you create beautiful, organized layouts easily.
Option7: Keepsake box
You have a simple box where you keep special mementos. It's functional, but it doesn't reflect the importance of what's inside. You want the outside to be as special as the contents.
Transform a plain box into a personalized keepsake by covering it with stickers. Choose designs that represent the memories stored inside, turning a simple container into a "treasure chest" that tells its own story.

This is a wonderfully personal project. The idea is to turn a simple wooden or cardboard box into a visual summary of its contents. If it's a box of concert tickets, cover it in stickers from your favorite bands. If it holds souvenirs from your travels, decorate it with stickers from the places you've been. For a longer-lasting finish, especially on a wooden box, you can seal the stickers with a layer of clear sealant like Mod Podge. This protects them from peeling and gives the whole box a professional, finished look, making it a true decorative object.
Option 8: Wall décor – canvas boards, wood, or metal panels
You want unique art for your walls but don't want to spend a fortune. Taping your favorite stickers directly to the wall looks temporary and messy. You need a more polished way to display them.
Create your own custom wall art by arranging a sticker collage on a blank canvas, wood panel, or metal sheet. This turns your collection into a single, cohesive piece of art that you can hang proudly.

This is the ultimate way to level up your sticker collection into real home decor. Buy a cheap blank canvas from any craft store and use it as your base. Before you stick anything down, take some time to plan your layout. You could create a dense, overlapping collage or a structured grid. Think about a theme—maybe it's all black and white stickers, or all designs from a specific artist. Once you're happy with the arrangement, start sticking them down. For a truly professional touch, you can paint the canvas a solid color first and then seal the final collage with a clear spray sealant. It's a simple DIY project that results in a one-of-a-kind piece of art.
Option 9: Sticker albums and books
Your sticker collection is growing, but they're getting bent and dusty in a pile. You want to preserve your favorites and be able to look at them without ruining their stickiness.
Use a reusable sticker album or book to collect, protect, and display your stickers. These books have special non-stick pages that let you place and reposition your stickers multiple times without damaging the adhesive.

For the serious collector, this is the perfect solution. These are not the sticker albums of our childhood where the stickers were stuck for good. Modern sticker books have pages made of the same silicone-coated paper that a sticker's backing is made from. This means you can stick your stickers onto the pages to display them, but you can peel them off again at any time with their adhesive fully intact, ready to be placed on a laptop or water bottle. It's the best of both worlds: you get to organize and enjoy your collection without the pressure of committing a rare sticker to a permanent home.
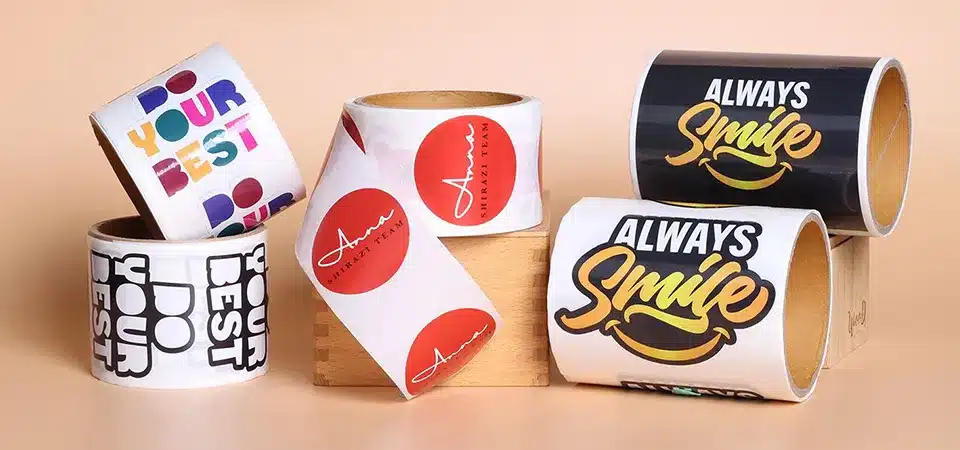
Option 10: Business & retail use
You need to get your small business noticed, but your marketing budget is tight. You need a simple, cost-effective tool that turns customers into fans and gets your brand seen.
Use custom stickers for business branding on packaging, shopping bags, and as free promotional giveaways. A well-designed sticker is a mini-billboard that travels everywhere your customers go, offering huge visibility for a small investment.

This is what my company specializes in, and I've seen it work wonders. A sticker is one of the most powerful, low-cost marketing tools available. Instead of paying for plain shopping bags, buy simple ones and seal them with a branded sticker. Use a sticker to seal the tissue paper inside your shipping boxes. And most importantly, include a free, cool-looking sticker with every single order. When a customer puts that sticker on their laptop, water bottle, or car, they're not just a customer anymore—they're a brand ambassador. That single sticker will be seen by hundreds of people, providing incredible marketing value.
Option 11: Clear phone case inserts
You love customizing your phone but hate a permanent commitment. You worry that putting a sticker directly on your expensive device will ruin its resale value or just be a sticky mess to remove.
To safely and temporarily customize your phone, place stickers on a piece of heavy paper cut to fit inside a clear phone case. This lets you swap out sticker designs whenever you want, with zero sticky residue.

This is my favorite sticker hack. It's simple, cheap, and endlessly customizable. Just trace the outside of your phone case and the camera cutout onto a piece of cardstock or photo paper. Cut it out, and now you have a blank template. You can arrange your favorite stickers on this paper insert, creating a perfect collage. Then, just pop the insert into your clear case. The case holds it firmly against your phone and protects the stickers. You can make a dozen different inserts for different moods, outfits, or seasons. It's the ultimate way to display stickers without any commitment.
Option 12: Binders with transparent sleeves
Your school or work binder is plain white or black, just like everyone else's. Sticking stickers directly onto the vinyl cover often looks messy, and they tend to peel at the corners.
Customize a binder with a clear cover sleeve by designing a sticker collage on a sheet of paper. Slide the finished design into the sleeve for a clean, protected, and easily updateable look.

This uses the same principle as the phone case hack but on a larger scale. Those binders with the clear plastic pocket on the front are perfect for this. Instead of fighting to get stickers to stick to the binder's strange plasticky surface, you just create your art on a standard sheet of paper. Create a theme for each school subject or work project. When the year is over or the project is done, you just slide the paper out and the binder is ready for its next life. The clear sleeve protects your stickers from getting scuffed up inside a backpack, keeping your design looking fresh all year.
Option 13: Light switch covers or outlet plates
You want to add a quirky, creative touch to a room without painting a whole wall or buying expensive art. You're looking for a small detail that makes a big impact and shows off your personality.
For an unexpected pop of art, apply a single, well-chosen sticker to a light switch cover or a blank outlet plate. This tiny, surprising detail adds charm and personality to a room in a simple, affordable way.

This is what I call "micro-decorating." It's about finding those small, forgotten spaces and making them delightful. The key here isn't to create a big collage, but to choose one single sticker that really shines. A beautiful botanical illustration, a funny quote, or a sleek geometric design can turn a boring light switch into a tiny piece of art. It's the kind of detail that guests notice and smile at. Best of all, it's completely reversible. If you ever want to change it, you can either peel the sticker off or just buy a new plastic cover plate for less than a dollar.
Option 14: Glass jars or candle holders
You have a collection of plain glass jars and candle holders that look uninspired. You want to turn them into stylish decor without spending a lot of money or effort.
Upcycle plain glass jars, vases, or candle holders by applying beautiful vinyl stickers. This is a quick and easy way to turn a basic container into a decorative piece that perfectly matches your home's style.

This is a fantastic way to give new life to items you already have. That old jam jar can become a chic pencil holder. That simple glass vase can be elevated with a few well-placed botanical stickers. For this, I recommend using stickers printed on a clear background. This gives a more elegant, "printed-on" look rather than looking like a white paper sticker on glass. If you're decorating a candle holder, the light from the flame can even shine through the sticker's colors, creating a beautiful effect. Just be sure to apply stickers to the outside and keep them away from the open flame.
Option 15: Mirror or window corners
You want to decorate a mirror or window but don't want to block your reflection or the view. You need a subtle way to add personality without being distracting or overwhelming.
Add a subtle accent by placing a small sticker or a delicate design in the corner of a mirror or window. This adds a personal touch without obstructing the surface's primary function, offering a small, delightful surprise.

This is all about adding a touch of whimsy. Think of a little floral vine "growing" up the corner of your bathroom mirror or a tiny motivational quote in the corner that you see every morning. It’s a detail that’s just for you. For windows, I strongly suggest using static clings instead of traditional stickers. They look just as vibrant but can be peeled off, moved, and reused without leaving any sticky residue behind. It's a perfect way to add seasonal decorations, like snowflakes in the winter or flowers in the spring, that can be easily changed.
How to display stickers - final tips
You have great ideas, but you want to ensure your stickers stick properly and look flawless. You're worried about them peeling, fading, or looking crooked and bubbly.
For a perfect display, always clean the surface with rubbing alcohol first. Plan your layout before you stick, smooth out bubbles with a credit card, and choose waterproof, laminated vinyl for any item that will be handled or exposed to weather.

Stickers aren’t just for decoration—they’re a way to personalize and tell your story. Following a few best practices ensures your story sticks around for a long time. The single most important step is cleaning the surface. Dust, oil, and wax are the mortal enemies of adhesive. A quick wipe with isopropyl (rubbing) alcohol and a clean cloth makes all thedifference. When you're ready to apply, don't just eyeball it. Plan your placement. For larger stickers, using a credit card or a small squeegee to press it down from the center outwards is the professional way to eliminate air bubbles and get a perfect, smooth finish.
| Do's | Don'ts |
|---|---|
| Do clean the surface with alcohol. | Don't apply to a dirty, dusty, or waxy surface. |
| Do use waterproof vinyl on items that get wet. | Don't use paper stickers on water bottles or cars. |
| Do plan your layout before peeling the backing. | Don't stick something down crooked and try to peel it up. |
| Do use static clings for delicate surfaces. | Don't put a permanent sticker on a valuable instrument. |
Conclusion
From laptops to light switches, there are endless ways to display stickers. Get creative, tell your story, and turn everyday objects into personal works of art.