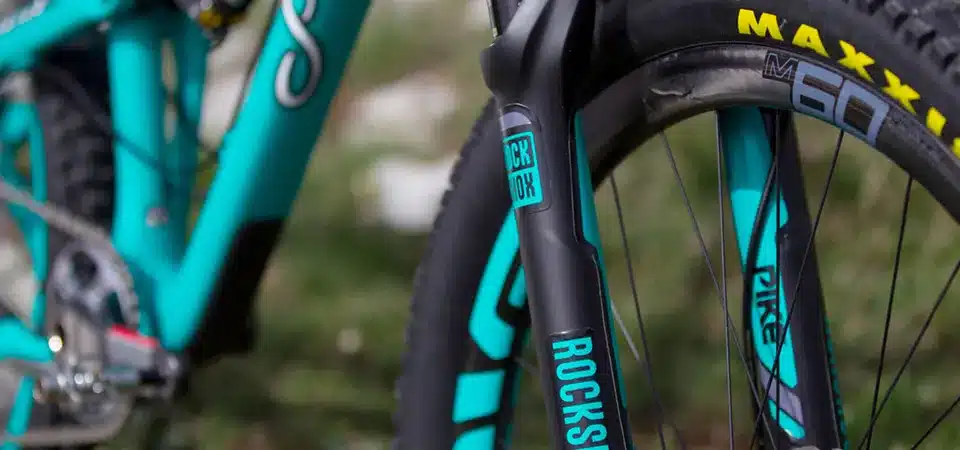
Your bike blends into the crowd, lacking that personal touch. It deserves to show off your personality. Custom stickers are the easiest way to make your ride stand out.
To design the best custom bike stickers, choose weatherproof vinyl for durability. Use bold, high-contrast colors and simple shapes for great visibility. Make sure the design reflects your personality and fits the bike frame's curves perfectly. A matte or glossy finish adds the final professional touch.
A great sticker can completely change how your bike looks and feels. But it’s not just about looks. There’s a lot that goes into creating a sticker that lasts and sends the right message. Let's break down how you can design the perfect sticker for your bike, step by step.
Why have a custom bike sticker?
Is your bike just another piece of equipment? It could be so much more. Custom stickers turn your ride into a personal statement, a safety tool, or a moving advertisement.
People use custom bike stickers for three main reasons: to express their personality, to promote a brand or cycling club, or to increase visibility and safety with reflective materials. They are an affordable way to personalize and upgrade any bike, making it uniquely yours.

Stickers are amazing tools for communication. They tell a story without saying a word. I've worked with so many cyclists who want to make their bike feel like their own. It’s not just a piece of metal; it’s a partner on their journeys.
Expressing Your Personal Style
This is the most common reason I see. Your bike goes where you go. Adding a sticker of your favorite band, a quote that inspires you, or a design you drew yourself makes the bike an extension of you. It's about turning a mass-produced frame into a one-of-a-kind piece of art. It’s that little touch that makes you smile before a ride.
Promoting Your Brand or Club
For cycling clubs or local businesses, a bike is a moving billboard. I've printed many orders for teams who want matching logos on their frames. It builds unity and looks professional. A local coffee shop even ordered stickers for delivery bikes to promote their business around town. It’s smart, low-cost advertising that really works.
Enhancing Safety on the Road
This is a very practical use. Bright, reflective stickers can save lives. Placing them on the frame, helmet, or wheel rims makes you much more visible to cars at night. We can make these in cool shapes and designs, so safety doesn't have to be boring. It's a simple addition that makes a huge difference, especially for commuters or evening riders.
Crafting Your Bike Sticker Design?
Have a great idea for a sticker but worried it won't look right? A poor design gets lost or peels away. Follow these simple tips to create a powerful, lasting design.
For a great bike sticker design, focus on simplicity and visibility. Use bold lines, high-contrast colors, and clear fonts that are easy to read from a distance. Make sure your design's shape works with the bike's frame and doesn't have tiny parts that could peel off easily.

When I work with clients on their sticker designs, I always start with one rule: keep it simple. A bike is a moving object, often seen from a distance or in motion. Complicated details get lost. The best designs are the ones you can understand in a split second.
Color and Contrast are Key
Your bike frame is the background for your sticker. If you have a black frame, a dark blue sticker will be almost invisible. You need high contrast. Bright colors like yellow, white, or neon green pop against dark frames. If your frame is light-colored, use dark, bold colors for your sticker. Think about how the sun will affect it too; UV-resistant inks are a must to prevent fading over time.
Simplicity in Shapes and Fonts
Intricate, spiky shapes have thin points that are the first to peel up after a few rainy rides or a wash. Simple shapes like circles, ovals, and rectangles last longer. The same goes for fonts. Choose a clean, bold font over a thin, cursive one. Readability is crucial, especially for a brand name or a safety message.
Here’s a quick guide:
| Feature | Good Choice | Bad Choice |
|---|---|---|
| Color | High-contrast | Low-contrast, similar to frame |
| Shape | Simple, rounded edges | Complex, sharp points |
| Font | Bold, sans-serif | Thin, script, decorative |
| Detail | Minimal, clean lines | Tiny text, intricate patterns |
Designing with these basics in mind ensures your sticker is not only cool but also practical.
How do you choose the right custom bike sticker size?
Have the perfect design but stuck on the size? The wrong size can look awkward or go completely unnoticed. A little planning ensures your sticker fits and looks just right.
To choose the right size, first measure the area on your bike where you want to place the sticker, like the top tube or seat tube. Use a measuring tape. Consider the tube's curve and leave a small border around the sticker so it doesn't look cramped.

I often get files from clients with amazing designs, but they haven't thought about sizing. A design that looks great on a screen can be overwhelming or invisible on a narrow bike tube. Sizing is just as important as the design itself.
Measure Your Frame First
Before you order, grab a ruler or a flexible sewing tape measure. Decide where you want the sticker to go. The most popular spots are the top tube, down tube, seat tube, and head tube. Measure the length and the width (or diameter) of the tube. Remember that tubes are round, so a sticker will wrap around them. A very wide sticker can distort on a thin tube.
Common Placements and Sizes
Here are some typical spots and the sizes that work well. This is just a guide, so always measure your own bike.
- Top Tube: This is a great spot for longer, thinner stickers. Think 1-1.5 inches tall by 4-8 inches long.
- Seat Tube: Perfect for logos or vertically oriented designs. Usually around 2-3 inches wide by 2-4 inches tall.
- Head Tube Badge: A classic spot for a small, badge-like emblem. Often 1.5 x 1.5 inches.
- Fork or Chainstays: Good for smaller branding or accent stickers.
Pro-Tip: Make a Paper Template
This is my best tip. Before you place an order, print your design on paper at the size you are considering. Cut it out and tape it to your bike. This gives you a real-world preview. You can see if it’s too big, too small, or if the placement is right. It’s a simple step that prevents disappointment later.
How to select the best materials for your bike stickers?
A new sticker looks great, but will it survive the outdoors? Rain, UV rays, and mud can ruin a weak sticker fast. The secret to durability is choosing the right material.
Always choose waterproof vinyl for bike stickers. It's durable and resistant to weather. For extra protection, add a laminate. A glossy laminate makes colors pop, while a matte laminate offers a modern, rugged look and reduces glare. Both protect the ink from scratches and UV fading.

The material is the unsung hero of a great custom sticker. As a sticker maker, I know that a fantastic design printed on the wrong material is a waste of money. For something like a bike that lives outside, you need tough stuff.
The Foundation: Weatherproof Vinyl
Paper stickers have no place on a bike. You need vinyl. Specifically, a high-quality weatherproof vinyl. This material is basically a thin plastic, so it won’t dissolve in the rain or turn to pulp. It's also flexible, which helps it adhere smoothly to the curved tubes of a bike frame. Always ask your printer if they use durable, outdoor-grade vinyl.
The Protector: Lamination Finishes
A laminate is a thin, clear protective layer applied over the printed vinyl. It's essential for bike stickers. It shields the ink from scratches from leaning your bike against a wall and, most importantly, from the sun's UV rays that cause colors to fade. You have two main choices:
| Finish | Look | Best For |
|---|---|---|
| Glossy | Shiny, vibrant, high-impact | Making colors pop, eye-catching brand logos |
| Matte | Non-reflective, subtle, rugged | A modern, understated look; reduces glare |
I personally love a matte finish for mountain bikes because it looks tough and doesn't show fingerprints as easily.
The Specialty Option: Reflective Material
For commuters or anyone riding at dawn or dusk, reflective vinyl is a fantastic choice. It looks normal in the daylight, but when a headlight hits it at night, it shines brightly. You can get your logo or any design printed on reflective material to combine branding with safety.
FAQs about Custom Bike Stickers?
Still have a few questions before you hit "order"? Uncertainty can hold you back. Here are quick answers to the most common questions I get about bike stickers.
The most common questions are about application and removal. To apply, clean the surface well, then peel and stick carefully from one side to the other to avoid bubbles. To remove, gently heat the sticker with a hairdryer to soften the adhesive, then peel it off slowly.

I want every customer to be happy with their stickers from start to finish. That includes knowing how to handle them properly. Here are some of the questions I answer for my clients almost every day.
How do I apply a bike sticker without bubbles?
A bubble-free application makes the sticker look professional. First, clean the bike frame surface with rubbing alcohol and let it dry completely. This removes any oil or dirt. When you're ready to apply, slowly peel the sticker from its backing. Start by pressing down one edge of the sticker and then smoothly press it down the rest of the way with your thumb or a credit card. This pushes any air out as you go. If you get a small bubble, you can often prick it with a tiny pin and smooth it out.
Will custom stickers damage my bike's paint?
If you use high-quality vinyl stickers, they should not damage the original factory paint on your bike. The adhesives are strong but designed to be removable. The key is how you remove it. Don't just rip it off. Gently warm the sticker with a hairdryer. This softens the glue, allowing you to peel it off slowly without pulling up paint. Any leftover sticky residue can be cleaned off with rubbing alcohol.
How long will my bike sticker last?
This depends on the material quality and the conditions. A high-quality, laminated vinyl sticker can last for 3 to 5 years, or even longer. It will withstand rain, sun, and washing. Cheaper, non-laminated stickers might only last a few months before they start to fade, peel, or crack. It's always worth investing in better materials for something that's exposed to the elements like a bike.
Conclusion
Designing the best bike sticker means blending personal style with durable, weather-proof materials. Focus on simple, visible designs that fit your frame and express who you are as a rider.


