You bought a beautiful transfer sticker, but you're terrified of messing up the application. Bubbles, misalignment, and torn vinyl can ruin the clean look you wanted, wasting your money.
First, clean your surface with alcohol. Use masking tape to create a "hinge" at the top for perfect positioning. Squeegee from the center out to prevent bubbles, then press firmly. Finally, peel the transfer tape back slowly at a sharp angle.
Getting that professional, "painted-on" look from a transfer sticker is easier than you think. In my business, the biggest problems I see come from rushing the process. But it's not hard! It's all about following a few key steps in the right order. Think of it as a recipe. If you follow it exactly, you'll get a perfect result every time. Let me walk you through the exact process we teach our clients for a flawless application.
What tools do you need before applying a vinyl transfer sticker?
You're ready to apply your sticker but grab whatever's nearby. Using your hands or the wrong cleaner can lead to bubbles, crooked placement, and a weak bond that fails later.
You need your sticker, a squeegee (or a credit card), masking tape, a measuring tape, and isopropyl alcohol with a lint-free cloth. Having these simple tools ready makes the process smooth and professional.

Before I even think about peeling a sticker backing, I lay out my tools like a surgeon. Having everything within reach stops you from taking shortcuts later. Each tool has a very specific job that's critical to getting a great result.
Your Application Toolkit
- Cleaning: Isopropyl (rubbing) alcohol and a clean, lint-free cloth like a microfiber towel are essential. The alcohol is a solvent that removes oils and residues without leaving any film behind, which is key for a strong bond.
- Positioning: A simple measuring tape and some low-tack masking tape are your best friends for alignment. They allow you to measure, mark, and secure your sticker's position before you commit.
- Application: A plastic squeegee provides firm, even pressure to activate the adhesive and push out air bubbles. If you don't have one, a credit card or a library card works perfectly. Just don't use your thumbs, as they create uneven pressure points.
In my experience as a manufacturer, I also have one secret tool for tricky spots or cold weather: a hairdryer. Gently warming the surface and the vinyl can make the adhesive more pliable and sticky, ensuring a better bond on cold days.
How to prepare the surface so the vinyl sticker sticks properly?
You apply your sticker, and it looks great, but it peels off a week later. The surface looked clean, but invisible dust and oils ruined the adhesive bond, wasting all your effort.
Clean the area thoroughly with isopropyl (rubbing) alcohol on a lint-free cloth. This dissolves oils, wax, and dust that prevent the sticker from bonding. Avoid window cleaners, as they leave residue. The surface must be 100% dry.

If you only do one step correctly, make it this one. As a sticker maker, I can tell you that almost all application failures are caused by skipping proper surface prep. The adhesive on a vinyl decal is strong, but it needs a perfectly clean surface to form a permanent bond.
Why Alcohol is the Magic Ingredient
Household cleaners, especially glass cleaners like Windex, are the enemy of a good sticker application. They contain soaps, ammonia, and other chemicals designed to reduce fog and streaking. These chemicals leave behind an invisible film that blocks the sticker's adhesive from making full contact with the surface. The sticker will feel like it's stuck at first, but it will fail prematurely. Isopropyl alcohol works differently. It's a pure solvent that cuts through grease and grime, and then it evaporates completely, leaving nothing behind.
Make sure the surface is also within a reasonable temperature range, ideally between 10°C and 32°C (50°F and 90°F). If it's too cold, the adhesive will be hard and won't stick well. If it's too hot, the adhesive can become too gummy.
How do you line up and position a vinyl transfer sticker accurately?
You need your logo perfectly centered, but getting the measurements right is stressful. Eyeballing it is a recipe for a slightly off-center design that will annoy you every time you look at it.
Use a measuring tape and masking tape to find your center. Measure the surface and mark the middle. Then, find the center of your decal. Use these reference points to align the sticker perfectly before taping it down.

The old saying "measure twice, cut once" definitely applies to sticker application. You only get one shot to get it straight. Taking just two extra minutes to measure will save you from a crooked decal that you have to live with for years.
Finding Your Center
- Measure the Surface: Use your measuring tape to find the center of the area where you want the decal. For a car window, I usually measure the total width and height and put a small piece of masking tape to mark the center point.
- Measure the Decal: Don't peel the backing yet! To find the center of your decal, you can either measure its width and height or gently fold the transfer tape over on itself (without creasing the vinyl) to find the middle. Mark this on the top edge of the transfer tape with a small piece of tape.
- Align and Secure: Now, just line up your center marks. Place the decal on the surface and adjust it until your marks align and the design looks visually straight. Step back and look at it from a few feet away to make sure it looks right before moving to the next step.
What is the easiest way to apply transfer tape?
You try to freehand a large sticker, but it sticks instantly where you don't want it. Now it's crooked, bubbly, and you can't reposition it without destroying the delicate vinyl design.
The easiest and safest way is the "hinge method." Tack the sticker in place with masking tape along the top edge. This creates a fool-proof hinge that locks in your perfect alignment and lets you apply the sticker with control.

When people ask me for one tip to make application easy, this is it. The hinge method removes all the stress of holding a large, floppy sticker and trying to get it straight. It gives you an "extra pair of hands" and makes the process incredibly simple. I use this method for everything from small logos to huge graphics.
How to Create a Hinge
Once you've positioned your sticker exactly where you want it (from the previous step), follow these steps:
- Secure the Top: Take a long piece of masking tape and run it along the entire top edge of the sticker. Place it so that half of the tape is on the sticker's transfer tape and the other half is on your surface.
- Test the Hinge: This masking tape is now your hinge. You should be able to flip the sticker up and down like a page in a book, and it will always fall back into the exact same spot.
- Prepare for Application: Flip the sticker up, toward the hinge. Now you're ready to remove the backing paper and apply the sticker with zero chance of it going on crooked.
How to use transfer tape to apply the sticker without bubbles?
You lay the sticker on, but ugly air bubbles are trapped right in the middle. Trying to chase them out with your thumb often creates even worse creases, ruining the smooth finish.
With your sticker hinged at the top, peel the backing paper off. Hold the bottom edge of the decal away from the surface and use a squeegee to apply it. Start from the top center and work outwards in firm, overlapping strokes.

This technique is all about controlling the application. By starting from the top and working your way down, you are systematically pushing air out as you go, leaving no room for bubbles to form.
The Center-Out Squeegee Technique
The key is to never let the entire sticker touch the surface at once.
- Flip and Peel: Flip your hinged sticker up so it's facing you. Carefully peel the paper backing away from the transfer tape, exposing the sticky side of the vinyl. Discard the paper backing.
- Start from the Top: Let the sticker hang down, but hold the bottom edge away from the surface. The only part touching should be near your masking tape hinge.
- Squeegee Downward: Place your squeegee at the top center of the decal. Using firm, even pressure, push down and outward at a 45-degree angle. First to the right, then back to the center, then to the left. Continue this motion in overlapping strokes all the way down the sticker. This pushes the air out to the sides instead of trapping it.
If a small bubble does appear, don't panic! Take a sewing pin, poke a tiny hole in the center of the bubble, and press the air out with your finger. The hole will be invisible.
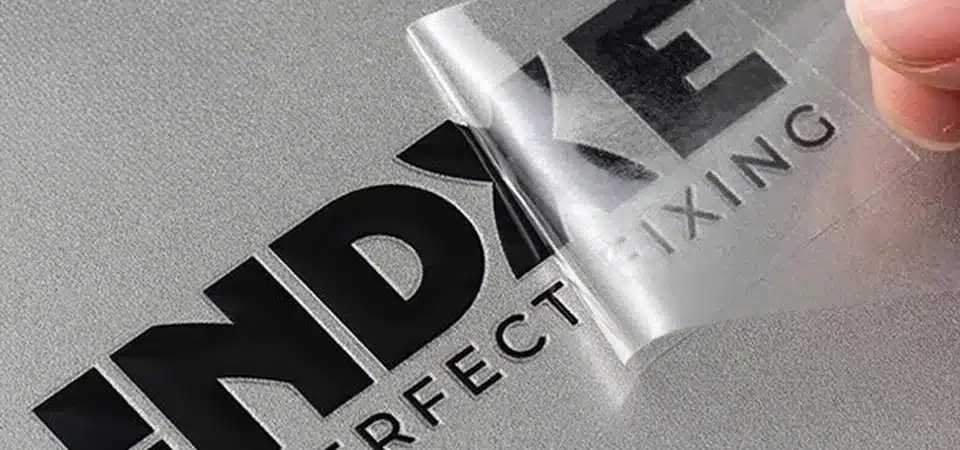
When and how should you peel off the transfer tape?
You applied the sticker and immediately rip off the transfer tape. The vinyl letters lift with it, tearing the design and leaving a sticky mess you can't fix.
After squeegeeing, press firmly over the whole design again. Then, peel the transfer tape back on itself at a very low, 180-degree angle. Do this slowly. If the vinyl lifts, press it back down and rub again before continuing.

This is the final, most satisfying step, but patience is critical. The adhesive needs a moment to bond, and your peeling technique determines whether the vinyl stays put.
The Low and Slow Peel
The biggest mistake I see is people pulling the tape straight up, away from the surface at a 90-degree angle. This pulls the vinyl upward and encourages it to lift. The correct way is to fold the transfer tape all the way back on itself, so it's almost flat against the surface you're peeling from.
This 180-degree angle creates shear force. It focuses all the energy on separating the tape from the vinyl, not lifting the vinyl from its new home. Pull slowly and watch the vinyl as you go. If you see any part of the design lifting, don't panic. Simply lay the tape back down over that area, give it a firm rub with your squeegee or fingertip, and then start peeling again.
Once the tape is off, I like to place the waxy side of the old backing paper over the decal and give it one final squeegee to ensure everything is perfectly bonded. Finally, let it cure for 24-48 hours before washing.
Conclusion
A perfect sticker application is easy: clean the surface, use the hinge method to position it, squeegee from the center out, and peel the transfer tape slowly.


